


- Room 1807, Unit 9, Building 2, Shangxing Commercial Street, Shangde Road, Shangxing Community, Xinqiao Subdistrict, Bao'an District, Shenzhen City, China
CONTACT US

WhatsApp

Contact Us
Our team is on stand by, waiting toassist you.
Videos
A large collection of educational videos and tutorials.
About Us
Learn about our company, leadership, and mission totransform manufacturing.
Privacy Policy
Applies to all personal information collected through and/or processed in connection.

Aerospace & UAV
WJ Prototypes is your 3D manufacturing partner from prototype to large scale production.
Consumer Electronics
New Product Introduction Solutions for Consumer Electronics.

Robotics & Automation
Need some assistance bringing your robotic device or parts from the sketch-board to reality?
Medical Devices
The medical industry needs high quality, dependable and safe parts and products.
Automotive
New Product Introduction Solutions for Automotive
Industrial Machinery
The main purpose of industrial prototyping is to take the product from drawings into the real world.

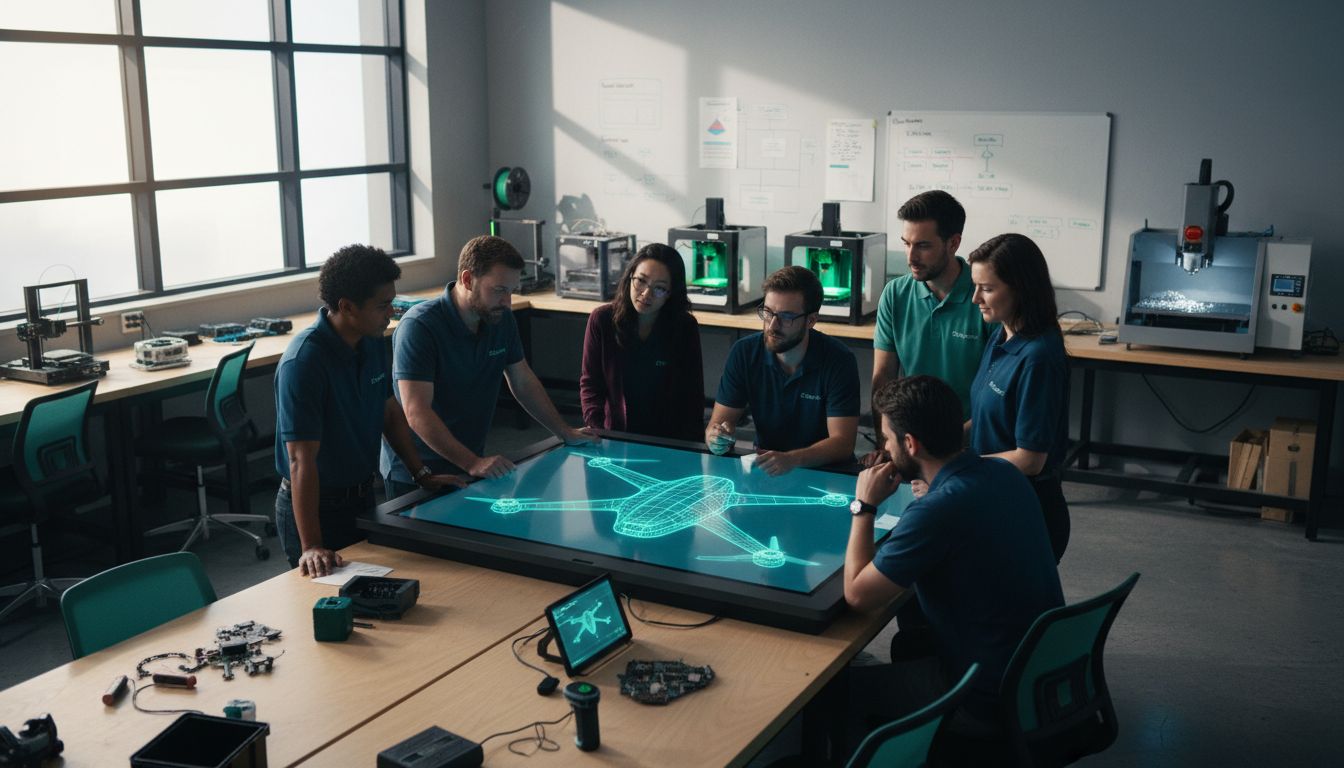
Over 60 percent of product developers report that unclear goals lead to costly delays and missed deadlines. Setting the right direction from the start can make the difference between a rapid success and endless revisions. When you understand how to define project goals, select materials, prepare precise files, and validate your prototype, you build a smoother path to market-ready results. This guide shows you how to avoid common mistakes and speed up every phase of the rapid prototyping process.
| Key Point | Explanation |
|---|---|
| 1. Define clear project goals. | Start by identifying the problem and target users for effective project direction. |
| 2. Choose appropriate technologies. | Align prototyping methods with project needs for successful material selection and fabrication. |
| 3. Submit precise design files. | Use professional CAD software to ensure accurate representation for manufacturers. |
| 4. Implement structured iterations. | Create prototypes in small batches, gathering feedback to inform incremental improvements. |
| 5. Conduct thorough validation tests. | Evaluate performance under real conditions to ensure user satisfaction and functionality. |
Defining clear project goals and requirements is the critical first step in your rapid prototyping journey. You will transform your initial concept into a structured blueprint that guides every subsequent stage of product development.
Starting with precise objectives helps minimize potential roadblocks and iterations. As research from arxiv.org demonstrates, customizing your development approach with rapid prototyping can significantly reduce project iterations across different stages. This means getting crystal clear about what you want to achieve right from the beginning.
To define your project goals effectively, start by asking yourself fundamental questions: What problem are you solving? Who is your target user? What are the core functionalities your prototype must demonstrate? Break down these broad questions into specific, measurable outcomes. For instance, instead of saying "create a better widget," specify "design a lightweight widget that reduces manufacturing cost by 20% and improves user ergonomics."
A practical technique involves creating a requirements matrix that maps out functional and technical specifications. arxiv.org suggests using visual techniques like manga storyboarding to help clarify high-level project goals early in the development lifecycle. This approach can make abstract requirements more tangible and help team members align on expectations.
Pro Tip: Always validate your initial requirements with potential end users or stakeholders. Their feedback can reveal insights you might have overlooked.
Once you have a comprehensive set of goals and requirements, you are ready to move into the conceptual design phase where these specifications will guide your initial prototyping efforts.
Choosing the right prototyping technologies and materials is a pivotal decision that can make or break your product development process. Your goal in this step is to match your project requirements with the most appropriate fabrication method and material characteristics.
Approaching material selection requires strategic thinking. Drawing insights from en.wikipedia.org, the pioneering work of Michael F. Ashby in materials science emphasizes the importance of comprehensive material selection approaches tailored to specific application needs. This means going beyond surface level considerations and diving deep into material properties that align with your prototype's functional requirements.
Start by creating a detailed matrix of your project specifications. Consider factors like mechanical strength, thermal resistance, cost, weight, and manufacturing complexity. Virtual interactive techniques can help streamline this process. Research from arxiv.org highlights how interactive projection techniques allow designers to visualize and interact with potential material and component configurations before final selection.
For most rapid prototyping projects, you will likely evaluate technologies like 3D printing (SLA, SLS, FDM), CNC machining, or injection molding. Each technology offers unique advantages. 3D printing excels in complex geometries, CNC machining provides high precision, while injection molding becomes cost effective for larger production runs.
Pro Tip: Always request material samples and conduct physical tests before committing to full production. A small investment in testing can prevent costly redesigns later.
Once you have selected your optimal technology and materials, you are prepared to move forward with creating your initial prototype design.

Submitting design files for quotation is a critical step that transforms your conceptual work into a tangible manufacturing opportunity. Your objective is to create precise digital representations that manufacturers can accurately interpret and price.
Research from cambridge.org highlights the importance of selecting appropriate prototyping mediums and capturing the design essence during this phase. This means your submitted files must communicate not just technical specifications but the fundamental intent behind your prototype.
Prepare your design files using professional CAD software that supports standard formats like STEP, IGES, or STL. These universal file types ensure compatibility across different manufacturing platforms. Pay special attention to file resolution technical details.cambridge.org emphasizes the concept of purposeful prototyping where every design element should serve a clear functional objective.
Ensure your files include multiple views dimensional measurements, material specifications, surface finish requirements and tolerance levels. The more comprehensive your documentation the more accurate your initial quotation will be. Include annotations or readme files explaining any complex design features or specific manufacturing considerations.
Pro Tip: Always export files at the highest quality resolution and double check file integrity before submission to prevent potential communication gaps.
Once your design files are prepared and submitted you will typically receive a detailed quotation outlining manufacturing costs timelines and potential design optimization suggestions.
Implementing prototype manufacturing is where your design transforms from concept to physical reality. This stage is critical for validating your initial product vision and uncovering potential improvements through structured iteration.
According to en.wikipedia.org, design processes can be effectively managed through time constrained approaches that reduce risk when bringing new products to market. In the context of prototyping, this means adopting a systematic method of creating manufacturing trials and learning from each iteration.
As fiveable.me suggests, successful prototyping involves prioritizing key features and communicating progress effectively. Start by manufacturing a small batch of prototypes that represent your core design requirements. Carefully document every aspect of the manufacturing process including material performance dimensional accuracy and any unexpected challenges that emerge during production.
Each prototype iteration should focus on incremental improvements. Collect detailed feedback from potential users stakeholders and manufacturing experts. Look for opportunities to simplify manufacturing processes reduce material costs or enhance functional performance. Pay close attention to how your prototype performs under realistic usage conditions and be prepared to make substantive design modifications.
Pro Tip: Maintain a comprehensive iteration log documenting every design change test result and feedback received to track your prototype evolution systematically.
Once you have refined your prototype through multiple iterations you will be ready to prepare for more advanced stages of product development.
Verifying and validating your prototype's performance is the critical gateway between design and potential market success. This stage transforms your prototype from a theoretical concept into a tangible product ready for rigorous evaluation.
en.wikipedia.org emphasizes a framework that focuses on usability goals and user characteristics throughout the design process. This means your validation should extend beyond technical specifications to understanding how real users interact with your prototype. Conduct comprehensive performance tests that simulate actual usage conditions checking mechanical strength durability functionality and user experience.
Drawing from en.wikipedia.org, effective validation involves researching and discovering system requirements through direct stakeholder engagement. Assemble a diverse testing group representing your target market. This might include potential customers engineers technical experts and even end users who can provide nuanced feedback about your prototype's real world performance.
Establish a structured testing protocol that breaks down evaluation into specific measurable criteria. Measure performance metrics like load bearing capacity thermal resistance electrical conductivity or whatever is most relevant to your specific prototype. Document every test result meticulously capturing both quantitative data and qualitative observations. Look for patterns in performance challenges and identify potential areas for future refinement.
Pro Tip: Create a standardized testing matrix that allows systematic comparison between different prototype iterations ensuring objective and comprehensive performance assessment.
Once you have thoroughly validated your prototype performance you will be prepared to make informed decisions about final product development and potential manufacturing scaling.
![]()
Navigating the complexities of rapid prototyping can be challenging when it comes to selecting the right materials, technologies and ensuring your design files translate perfectly into physical models. This guide highlights crucial steps like defining clear project goals, precise file preparation and iterative manufacturing—all essential to reduce costly errors and speed up your journey from concept to market.
At WJ Prototypes, we understand these pain points and specialise in delivering fast, high-quality and cost-effective rapid prototyping services tailored to your unique project requirements. Whether you need advanced additive manufacturing methods like SLA and DMLS or precision CNC machining and injection moulding, our expert engineers and ISO certified processes support every stage outlined in your prototyping journey. Explore how our comprehensive services can help you validate your design, optimise materials and accelerate production with confidence.
Don't let uncertainties slow down your product development. Contact WJ Prototypes today to get an instant quote, benefit from our detailed service descriptions, and start turning your innovative ideas into reality with reliable rapid prototyping solutions.
Begin by defining your project goals and requirements. Identify the problem you want to solve, determine your target user, and outline specific functionalities your prototype must fulfill.
Evaluate your project specifications against available prototyping technologies. Consider factors like mechanical strength, cost, and production volume, and create a detailed material selection matrix for clarity.
Prepare your design files in universal formats such as STEP, IGES, or STL. Ensure that they include multiple views, dimensional measurements, and material specifications to communicate your design effectively.
Focus on manufacturing a small batch of prototypes that represent your core design. Document every aspect of the process and collect feedback to make incremental improvements on future iterations.
Conduct comprehensive tests that simulate real-world usage conditions to check functionality and durability. Use a structured testing protocol to measure specific performance metrics and document your results systematically.
Start with clearly defined project goals and create a requirements matrix early on. Engaging potential users for feedback can help refine your objectives and significantly reduce the number of iterations needed.
SERVICES
RESOURCES


