


- Room 1807, Unit 9, Building 2, Shangxing Commercial Street, Shangde Road, Shangxing Community, Xinqiao Subdistrict, Bao'an District, Shenzhen City, China
CONTACT US

WhatsApp

Contact Us
Our team is on stand by, waiting toassist you.
Videos
A large collection of educational videos and tutorials.
About Us
Learn about our company, leadership, and mission totransform manufacturing.
Privacy Policy
Applies to all personal information collected through and/or processed in connection.

Aerospace & UAV
WJ Prototypes is your 3D manufacturing partner from prototype to large scale production.
Consumer Electronics
New Product Introduction Solutions for Consumer Electronics.

Robotics & Automation
Need some assistance bringing your robotic device or parts from the sketch-board to reality?
Medical Devices
The medical industry needs high quality, dependable and safe parts and products.
Automotive
New Product Introduction Solutions for Automotive
Industrial Machinery
The main purpose of industrial prototyping is to take the product from drawings into the real world.

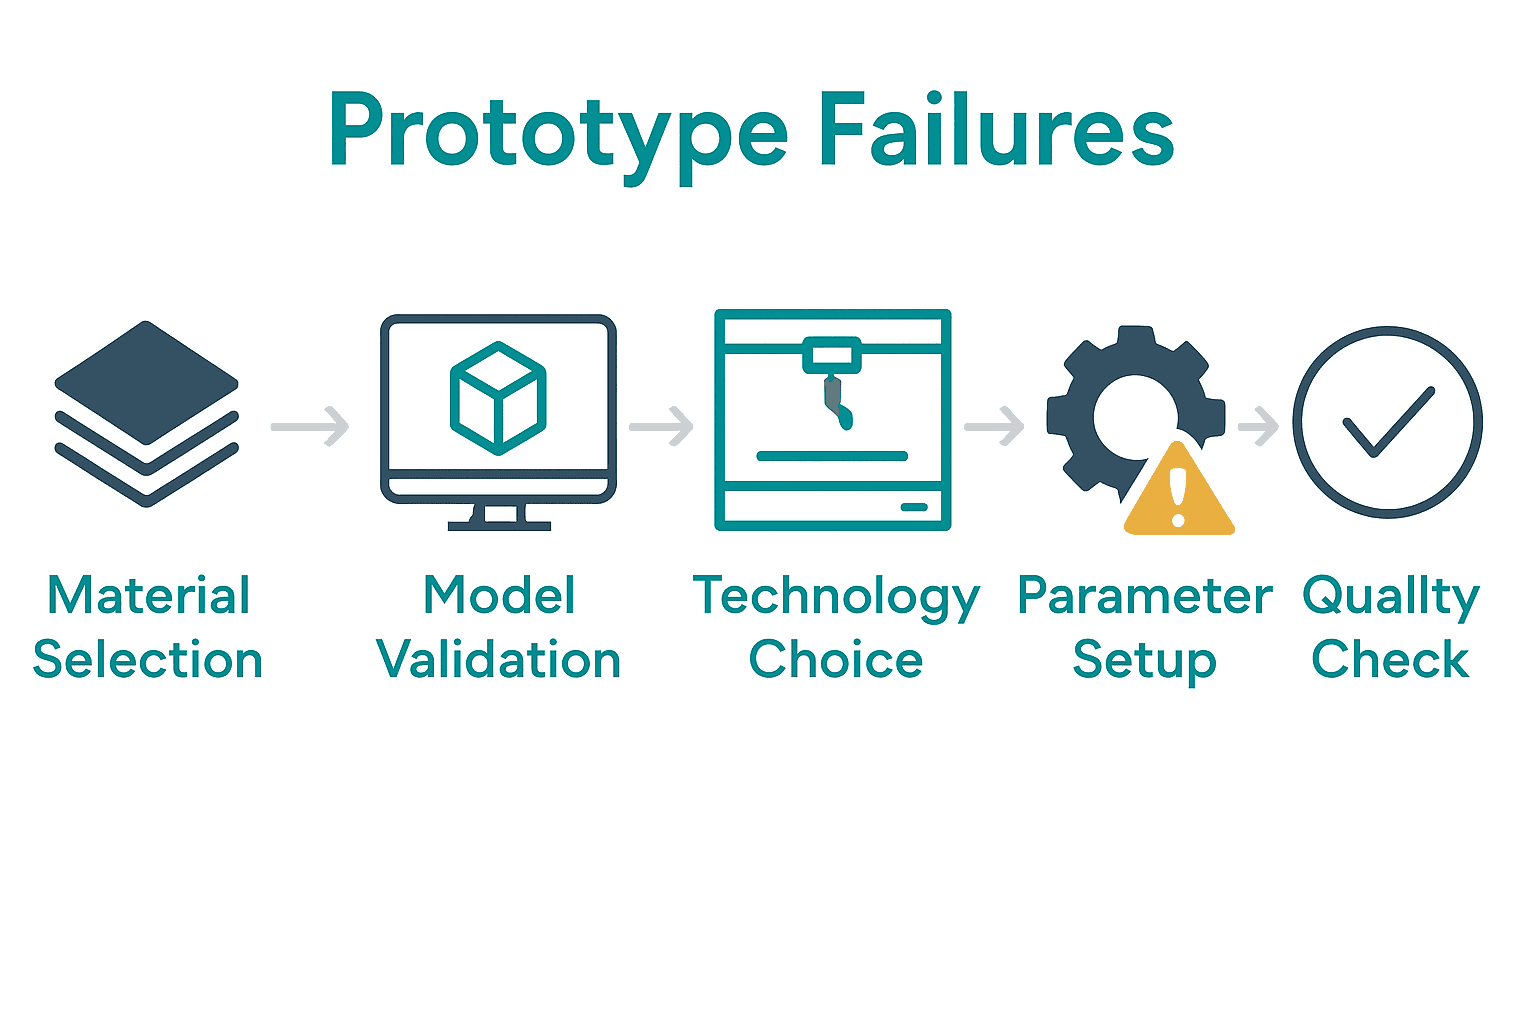
Over 90 percent of failed prototypes can be traced back to missed steps early in the additive manufacturing process. Creating a successful prototype involves more than just hitting print on a 3D model. Each decision from material selection to quality checks shapes the final outcome. This guide breaks down the essential steps that ensure your prototype not only prints correctly but also meets every design and performance requirement.
| Key Point | Explanation |
|---|---|
| 1. Define specifications carefully | Document functional requirements to guide material choices effectively for your prototype's success. |
| 2. Validate 3D models thoroughly | Utilize established standards to ensure your CAD model meets manufacturing process constraints and design integrity. |
| 3. Choose suitable technology wisely | Match the additive manufacturing method to your project needs, considering factors like material and surface requirements. |
| 4. Optimize build parameters effectively | Adjust machine settings such as layer height and print speed to ensure optimal prototype quality and accuracy. |
| 5. Conduct thorough quality verification | Use precise measuring equipment to confirm compliance with design specifications, documenting any improvements needed for future iterations. |
Defining product specifications and selecting the right materials are foundational steps in your additive manufacturing workflow that will determine your prototype's success. According to research from MDPI, a systematic approach for material selection involves carefully assessing specific material properties that align with your design requirements.
Start by comprehensively documenting your product's functional requirements. What mechanical stresses will the prototype experience? What environmental conditions must it withstand? These questions help narrow material choices. As JMSG highlights, additive manufacturing offers an extensive range of materials including polymers, metals, ceramics, and composites each with unique performance characteristics. Evaluate critical parameters like tensile strength, yield strength, fatigue resistance, and density to match your specific application needs.
Pro tip: Do not select materials in isolation. Collaborate with your manufacturing team to understand printability, potential post processing requirements, and cost implications. This cross functional approach ensures your material selection balances technical performance with practical manufacturability.
Your next step will involve translating these specifications into a precise digital design ready for prototyping.Explore our detailed guide on 3D printing materials to dive deeper into material selection strategies.
Preparing and validating 3D models is a critical step in ensuring your prototype translates seamlessly from digital design to physical reality. According to research from arXiv, ensuring manufacturability requires carefully analyzing and modifying 3D models to meet specific manufacturing process constraints while maintaining the design's core integrity.
Begin by performing a comprehensive design review using established standards. As outlined by ASME, the Y14.41 standard provides critical guidelines for digital product definition, helping you validate your CAD model against manufacturing requirements. Focus on key aspects such as wall thickness, minimum feature size, support structures, and potential geometric complexities that could impact printing. Pay special attention to build orientation optimisation which can significantly reduce potential print failures and material usage.
Pro tip: Use advanced 3D model validation software that can automatically detect potential manufacturing issues like thin walls, unsupported overhangs, or non manifold geometries. This proactive approach helps identify and resolve design challenges before moving to physical prototyping. Your next step involves selecting the most appropriate additive manufacturing technique based on your validated design.Dive into our comprehensive 3D printing guide for deeper insights into design validation strategies.
Selecting the right additive manufacturing technology is a pivotal decision that will directly impact your prototype's quality, performance, and overall success. According to insights from Autodesk, choosing an appropriate technology requires a comprehensive understanding of specific design considerations, including material compatibility, resolution capabilities, and available build volume.
Begin by thoroughly evaluating your product requirements against the unique strengths of different additive manufacturing techniques. As highlighted by Tennessee Government, the selection process should prioritize matching technological capabilities with your specific project needs. Consider key factors such as geometric complexity, surface finish requirements, mechanical properties, material diversity, and production volume. Common technologies like Stereolithography (SLA), Selective Laser Sintering (SLS), Fused Deposition Modeling (FDM), and Direct Metal Laser Sintering (DMLS) each offer distinct advantages depending on your prototype's specifications.
Pro tip: Create a decision matrix that ranks potential additive manufacturing technologies against your critical design parameters. This systematic approach helps objectively compare and score different methods, ensuring you select the most suitable technology for your specific prototype requirements. Your next step involves preparing for the actual manufacturing process by understanding the selected technology's specific preparation and execution protocols.Learn more about choosing the right prototyping process to refine your technology selection strategy.
Setting up precise build parameters is a critical phase that transforms your digital design into a physical prototype. According to research from JGED, calibrating the printing process requires meticulous adjustment of parameters to ensure optimal mechanical properties and dimensional accuracy of the final product.
Begin by configuring machine specific settings based on your selected additive manufacturing technology and material characteristics. This involves fine tuning critical parameters such as layer height, print speed, temperature, support structures, and infill density. Emerging research from arXiv suggests leveraging advanced AI models can help streamline debugging and manipulation of production parameters, potentially reducing setup time and improving overall print quality. Pay close attention to your machines build volume, material compatibility, and recommended processing conditions to maximize success rates.
Pro tip: Always perform a small test print to validate your parameter settings before running the full production batch. This approach allows you to identify and correct potential issues early, saving time and material costs. Your final step involves carefully monitoring the initial production stages and being prepared to make real time adjustments as needed. The prototype is now ready to move into the post processing phase where further refinements will occur.
Explore our comprehensive guide on rapid prototyping processes to deepen your understanding of production parameter optimization.
Post-processing transforms your raw 3D printed prototype into a refined final product, addressing surface quality, dimensional accuracy, and functional requirements. According to ScanIP, advanced software technologies now offer sophisticated options for volume and topology preserving smoothing, which are crucial for achieving high quality finishing results.
Initiate your post-processing workflow by removing support structures and conducting initial surface cleaning. Depending on your chosen additive manufacturing technology, you might need to employ techniques such as sanding, chemical smoothing, painting, or specialized coating processes. Materialise Mimics highlights the importance of precise surface model preparation, which can significantly impact the final prototype quality. Consider the mechanical and aesthetic requirements of your specific project when selecting post processing techniques. Common methods include manual sanding, media blasting, electroplating, painting, and applying specialized surface treatments that enhance durability, conductivity, or visual appearance.
Pro tip: Always wear appropriate personal protective equipment during post processing and work in a well ventilated area. Different materials and finishing techniques require specific safety precautions. Start with less aggressive techniques and progressively refine your approach to avoid compromising the prototypes structural integrity. Your final prototype is now ready for functional testing and potential design iterations.Learn more about advanced prototyping techniques to enhance your post processing skills.
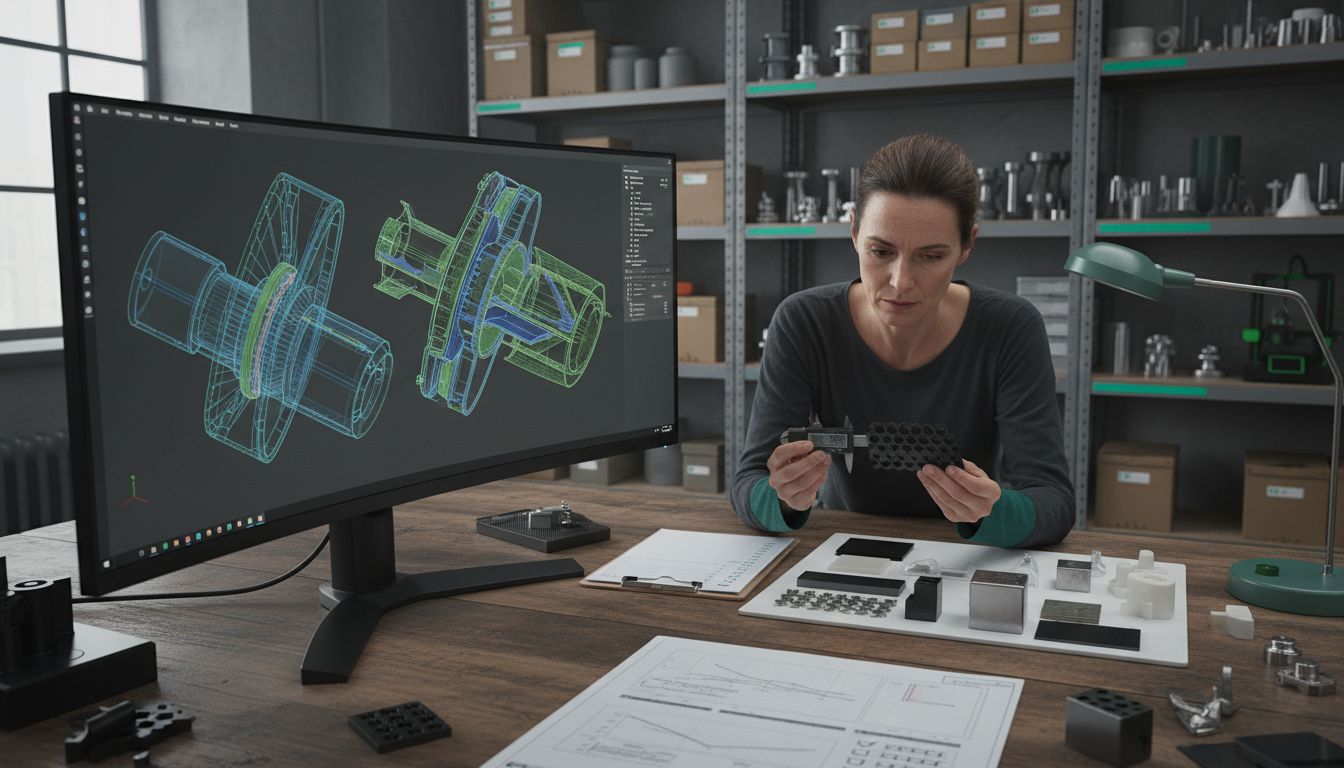
Quality verification is the critical final checkpoint that transforms your prototype from a manufactured object to a validated engineering solution. According to Geometrical Product Specification and Verification, establishing a common language and standardized approach is fundamental to ensuring precise geometric compliance and manufacturing quality.
Begin your verification process by conducting comprehensive dimensional inspections using calibrated measuring equipment such as coordinate measuring machines (CMM), optical scanners, or precision micrometers. 3D Manufacturing Format standards now provide advanced file formats that include detailed material and color information, enabling more nuanced quality assessments. Compare your prototype against the original design specifications paying close attention to critical parameters like dimensional tolerances, surface finish, material properties, and functional requirements.
Utilize both quantitative measurements and qualitative visual inspections to capture a holistic understanding of the prototypes performance.
Pro tip: Document every measurement and observation systematically. Create a detailed verification report that not only highlights compliance but also captures any deviations or potential improvement areas. This documentation serves as valuable feedback for future design iterations and helps establish a robust quality control process. Your prototype has now undergone rigorous validation and stands ready for potential functional testing or final presentation.
Explore our guide on advanced prototyping techniques to further refine your quality verification skills.
Navigating the complexities of additive manufacturing requires not only understanding material selection, design validation, and technology choice but also streamlined access to reliable production services. If you have wrestled with ensuring precise build parameters, flawless post-processing, or rigorous quality verification, you are not alone. Many innovators face these exact challenges as they strive for prototypes that meet exacting standards without sacrificing speed or cost efficiency.
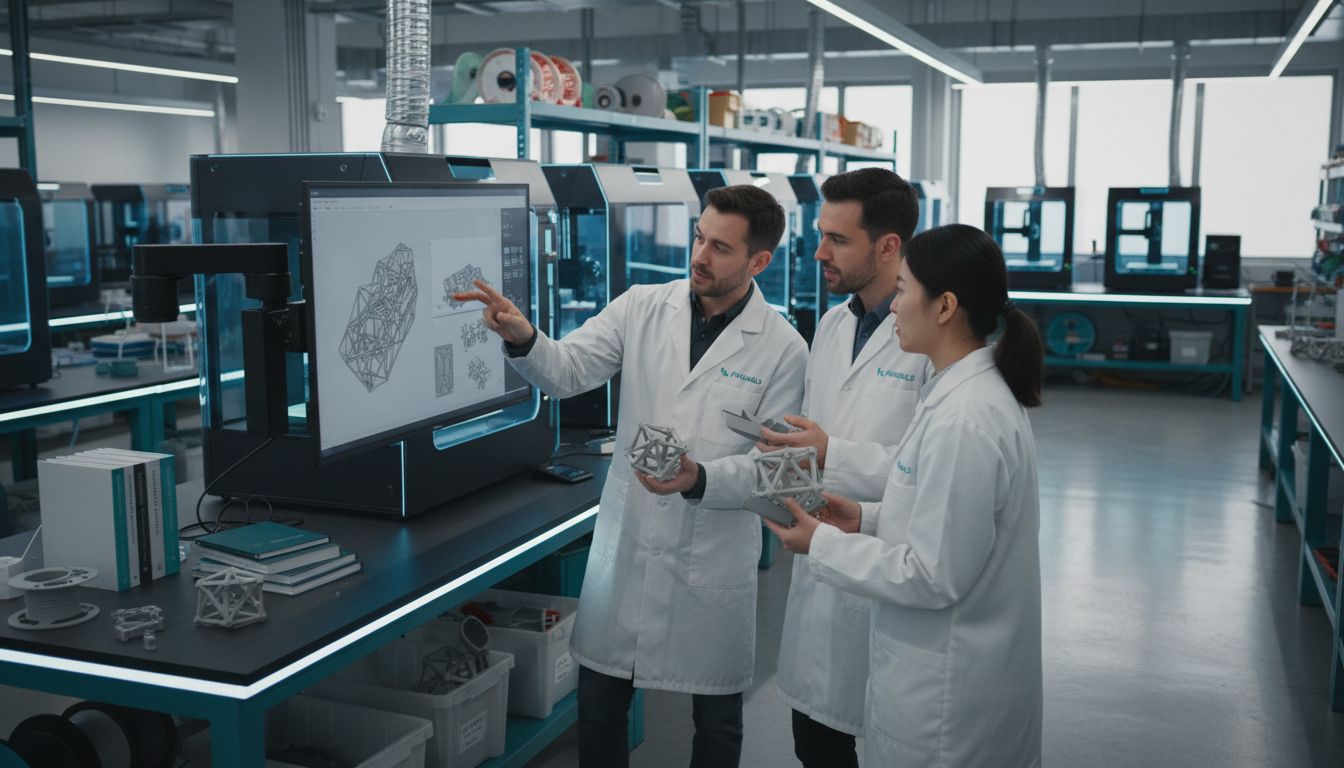
At WJ Prototypes, we specialise in transforming your additive manufacturing workflow into a seamless reality. Backed by advanced technologies such as SLA, SLS, MJF, and DMLS, and supported by a skilled engineering team, we focus on high-quality, fast, and cost-effective prototypes that align perfectly with your functional and aesthetic demands. Discover how our comprehensive manufacturing services can help you overcome common prototyping pain points like material limitations or design complexities by visiting our professional manufacturing and rapid prototyping solutions. Take the next step towards rapid, reliable prototyping by exploring our detailed guides and expert insights or jump directly into a custom quote today to start turning your designs into reality.
To define product specifications, start by documenting the functional requirements of your prototype, such as mechanical stresses and environmental conditions. Create a detailed list of these requirements to guide your material selection process.
Consider materials based on their properties like tensile strength, yield strength, and fatigue resistance that align with your design requirements. Assess your project needs and collaborate with your manufacturing team to choose the best materials for functionality and manufacturability.
To validate your 3D model, perform a thorough design review using established standards to ensure manufacturability. Check for key aspects like wall thickness, support structures, and build orientation that can help prevent printing failures.
Your choice should be influenced by factors such as material compatibility, production volume, and surface finish requirements. Create a decision matrix to systematically evaluate different technologies against your project needs for the best fit.
Begin post-processing by removing support structures and cleaning the prototype's surface. Depending on your requirements, proceed with techniques like sanding or painting to achieve the desired finish while preserving structural integrity.
To ensure quality, perform comprehensive dimensional inspections using calibrated measuring equipment to verify compliance with design specifications. Document all measurements meticulously to identify any deviations and areas for improvement.
SERVICES
RESOURCES


