


- Room 1807, Unit 9, Building 2, Shangxing Commercial Street, Shangde Road, Shangxing Community, Xinqiao Subdistrict, Bao'an District, Shenzhen City, China
CONTACT US

WhatsApp

Contact Us
Our team is on stand by, waiting toassist you.
Videos
A large collection of educational videos and tutorials.
About Us
Learn about our company, leadership, and mission totransform manufacturing.
Privacy Policy
Applies to all personal information collected through and/or processed in connection.

Aerospace & UAV
WJ Prototypes is your 3D manufacturing partner from prototype to large scale production.
Consumer Electronics
New Product Introduction Solutions for Consumer Electronics.

Robotics & Automation
Need some assistance bringing your robotic device or parts from the sketch-board to reality?
Medical Devices
The medical industry needs high quality, dependable and safe parts and products.
Automotive
New Product Introduction Solutions for Automotive
Industrial Machinery
The main purpose of industrial prototyping is to take the product from drawings into the real world.

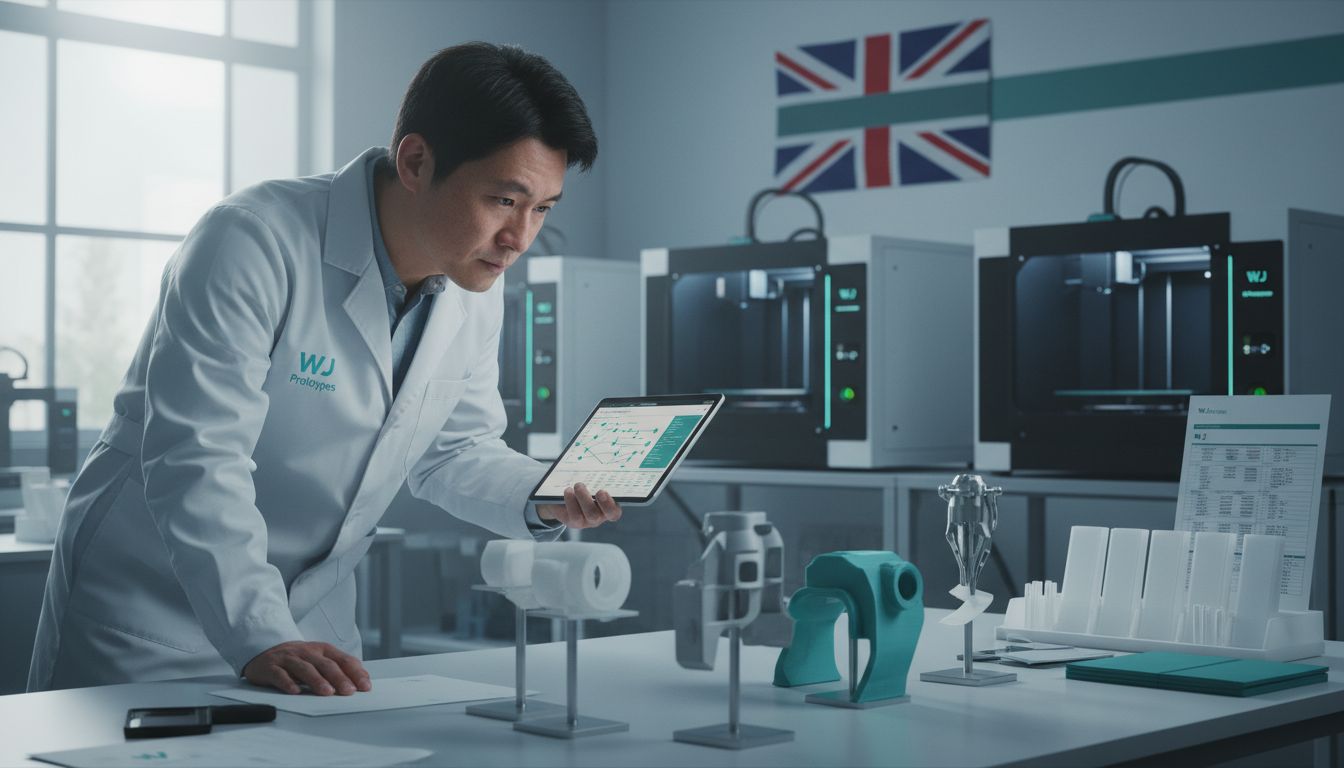
Every british engineer aiming for precision knows how quickly additive manufacturing projects can become complex without clear planning. Over 60 percent of failed prototypes are linked to rushed preparation or poor material choices. Selecting the right goals, materials, and technologies is vital for creating reliable results. This guide walks you through every key phase, offering practical insights that help you master each stage and achieve top-quality outcomes from your next british prototyping project.
| Key Point | Explanation |
|---|---|
| 1. Define clear project goals | Establish specific objectives to streamline the prototyping process and guide material selection effectively. |
| 2. Evaluate material properties thoroughly | Assess mechanical traits such as tensile strength and heat resistance against project requirements to ensure optimal material choice. |
| 3. Optimise CAD designs for printability | Prepare your computer-aided design by minimising complexity and ensuring suitable geometries before proceeding with manufacturing. |
| 4. Validate build configurations meticulously | Systematically check machine settings and perform test prints to confirm dimensional accuracy and quality consistency. |
| 5. Conduct rigorous quality inspections | Use advanced measuring tools to evaluate final parts against design specifications, ensuring precision and structural integrity. |
Successful additive manufacturing begins with crystal clear project objectives and strategic material selection. Understanding precisely what you want to achieve will dramatically streamline your prototyping process and prevent costly missteps.
Research from vbn.aau.dk emphasises the critical importance of defining project goals and material requirements early in the development cycle. Start by documenting your specific performance expectations. Are you creating a functional prototype? A visual model? An end-use part? Each objective demands different material characteristics.
Your material selection process should consider multiple parameters.
 Evaluate mechanical properties like tensile strength, flexibility, heat resistance, and durability. Compare potential materials against your project requirements. As research from arxiv.org suggests, advanced machine learning techniques are now helping engineers accelerate material discovery for optimal performance.
Quick pro tip: Create a detailed matrix comparing your project requirements against potential material properties. This systematic approach helps eliminate guesswork and ensures you select the most appropriate additive manufacturing material for your specific application.
With your goals and materials strategically defined, you are now ready to move forward to the next phase of your additive manufacturing journey.
Choosing the right additive manufacturing technology is a strategic decision that can make or break your prototyping success. Your selection will directly impact the quality, cost, and performance of your final product.
According to research from link.springer.com, selecting an appropriate 3D printing system involves navigating complex technical and economic criteria. You will need to evaluate multiple factors including part geometry, material requirements, production volume, surface finish, and dimensional accuracy.
Compare key technologies systematically. Each method offers unique advantages. Fused Deposition Modeling (FDM) works well for rapid prototyping with thermoplastics. Stereolithography (SLA) provides exceptional surface detail for intricate designs. Selective Laser Sintering (SLS) excels with complex geometries and functional parts. Research from mdpi.com suggests using multi-criteria evaluation methods to systematically rank potential technologies.
Pro tip: Create a weighted evaluation matrix scoring each additive manufacturing technology against your specific project requirements.
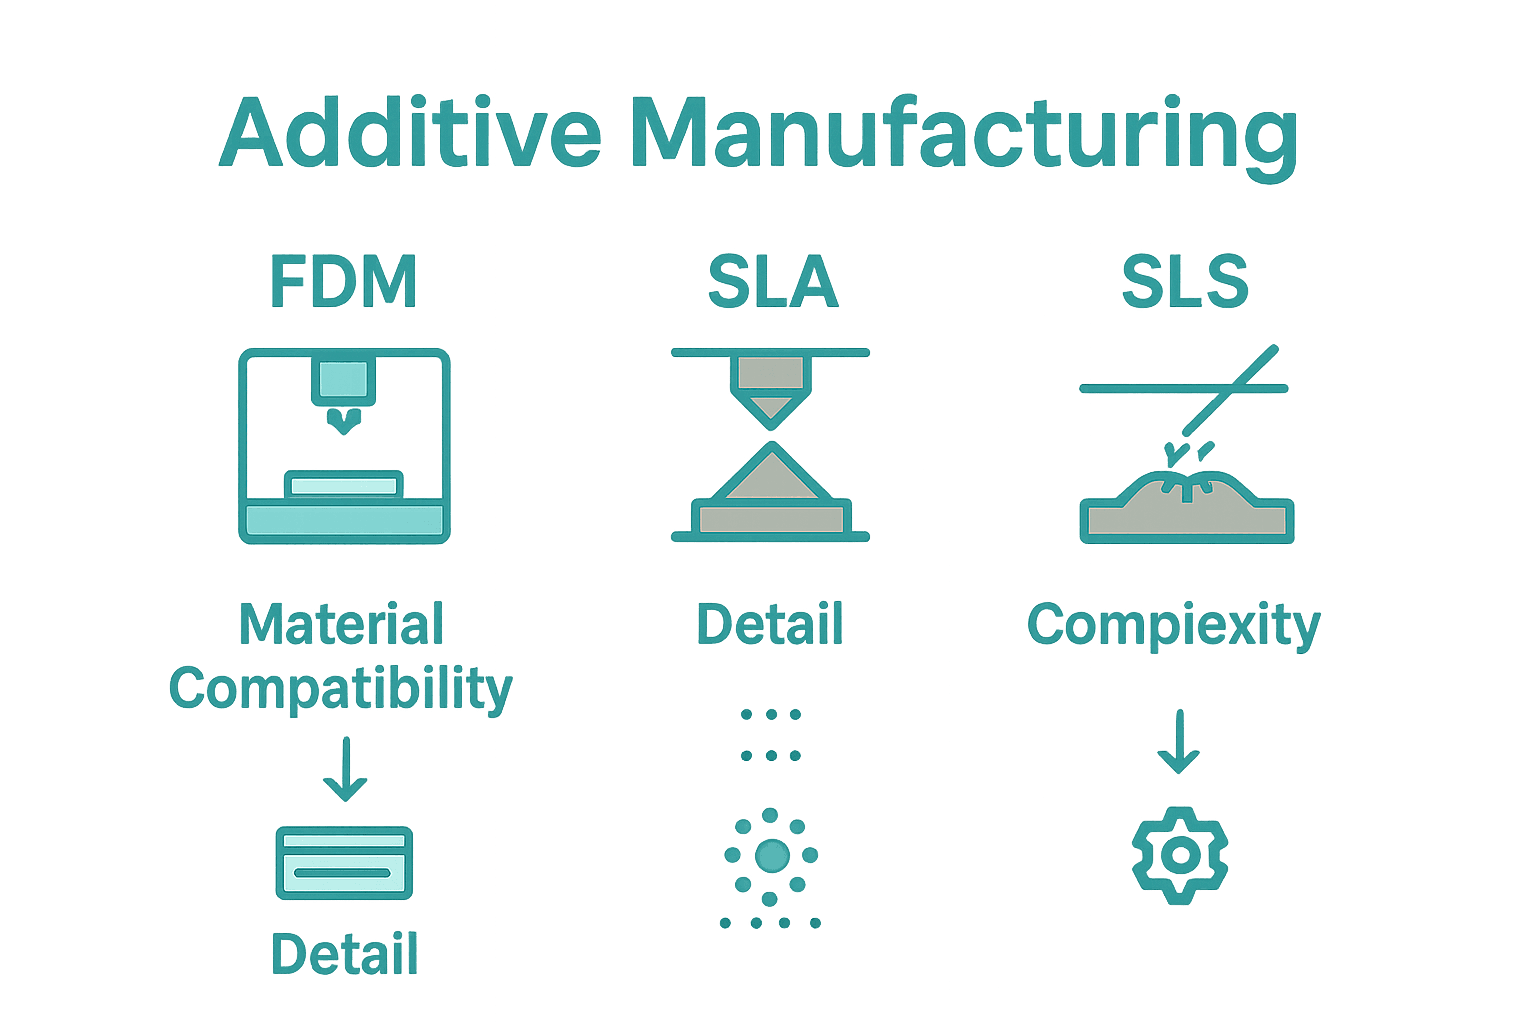
This approach helps eliminate subjective decision making and ensures you select the most appropriate method.
With the right technology selected, you are now prepared to move forward in your precision prototyping journey.
Successful additive manufacturing begins with meticulous computer-aided design preparation. Your CAD model serves as the critical blueprint that determines the quality and feasibility of your final prototype.
Research from arxiv.org highlights the critical importance of assessing model printability before manufacturing. You will need to carefully evaluate your design for potential manufacturing challenges. This involves examining mesh complexity, wall thickness, overhanging features, and geometric intricacies that might complicate the printing process.
Precision matters. Ensure your CAD model meets specific additive manufacturing requirements by considering several key factors. Minimise unsupported overhangs by incorporating design features like gradual angles or support structures. Maintain consistent wall thicknesses to prevent warping or structural weakness. arxiv.org suggests implementing a digital twin framework that allows real-time predictive control, enabling you to anticipate potential manufacturing issues before actual production.
Pro tip: Use specialized CAD optimization software that can automatically analyse and suggest modifications to improve your design's printability. These tools can identify potential issues and recommend geometric adjustments that enhance manufacturing success.
With your CAD design optimised, you are now prepared to proceed to the next critical stage of your additive manufacturing workflow.
Careful build setup and configuration validation are fundamental to achieving high-quality additive manufacturing results. Your preparatory steps will directly influence the precision and performance of your final prototype.
Research from arxiv.org emphasises the importance of developing a high-throughput computational framework for selecting optimal processing parameters. You will need to meticulously configure your machine settings, focusing on critical variables such as layer thickness, print speed, temperature, and material feed rate. Each parameter must be precisely calibrated to match your specific design requirements and material characteristics.
Precision demands systematic validation. According to research from mdpi.com, achieving geometric and dimensional accuracy requires careful configuration checks. Begin by running test prints that validate your machine settings. Compare the printed prototype against your original CAD design, measuring dimensional tolerances and assessing surface quality. Pay special attention to potential sources of deviation such as thermal expansion, material shrinkage, and machine calibration.
Pro tip: Create a standardised configuration checklist that you can replicate across different print jobs. This approach helps maintain consistency and reduces the likelihood of unexpected manufacturing variations.
With your build setup meticulously prepared and configurations validated, you are now ready to initiate the actual additive manufacturing process.
The moment of truth arrives as you transition from preparation to actual manufacturing. Your carefully planned design and configuration will now be transformed into a tangible prototype through precise additive manufacturing execution.
Research from arxiv.org highlights the importance of implementing a digital twin framework with real-time predictive control during the manufacturing process. This means continuously monitoring your print job, tracking key parameters, and being prepared to make adaptive adjustments. Watch for environmental conditions like temperature and humidity, ensure material feed consistency, and maintain machine calibration throughout the build.
Precision is paramount. According to research from arxiv.org, successful execution requires a high-throughput computational approach to minimize potential defects. Implement a systematic monitoring strategy that tracks layer formation, thermal dynamics, and material deposition. Pay close attention to critical indicators such as layer adhesion, dimensional accuracy, and surface integrity. Be prepared to pause or adjust the process if any anomalies emerge.
Pro tip: Document every print job meticulously. Record machine settings, environmental conditions, and any observations during the process. This documentation becomes invaluable for troubleshooting and process optimization in future manufacturing runs.
With the additive manufacturing process complete, you are now ready to move on to post processing and final prototype evaluation.
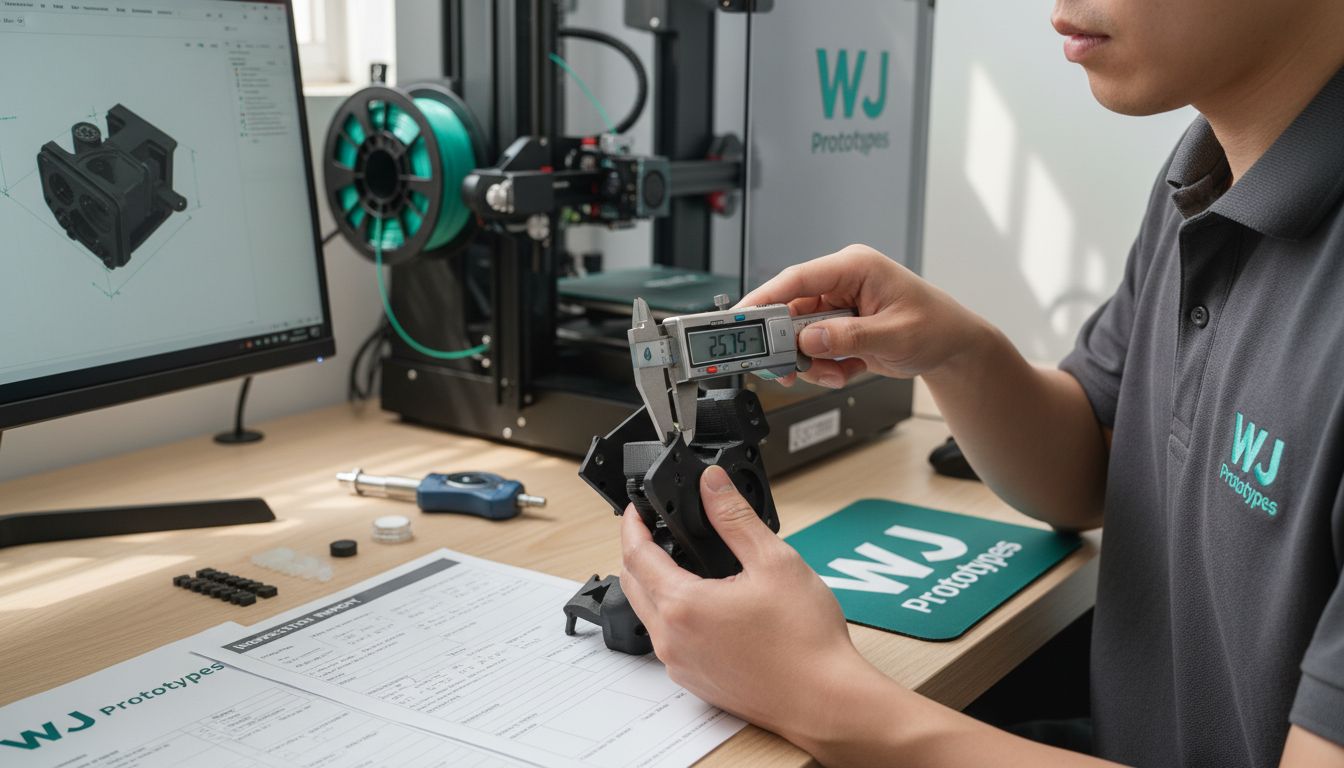
Your additively manufactured prototype is now complete, and the critical stage of rigorous quality inspection begins. This final verification step transforms your manufactured part from a raw prototype to a precision engineering component.
Research from mdpi.com emphasises the importance of comprehensive part evaluation, focusing on geometric and dimensional accuracy. You will need to conduct a systematic multi-dimensional inspection that goes beyond simple visual assessment. Employ precise measuring tools such as coordinate measuring machines (CMM), optical scanners, and digital comparison software to validate your part against the original CAD design.
According to research from arxiv.org, assessing printability requires thorough examination of multiple quality parameters. Scrutinise surface finish, dimensional tolerances, structural integrity, and material consistency. Look for potential defects like layer lines, porosity, warping, or microstructural irregularities. Pay special attention to critical geometric features that impact part functionality, comparing actual measurements against your design specifications with micrometre precision.
Pro tip: Develop a standardised quality inspection checklist that covers both quantitative measurements and qualitative assessments. This systematic approach ensures consistent and comprehensive evaluation across different prototyping projects.
With your final part meticulously inspected and validated, you are now prepared to move towards the final stages of your additive manufacturing workflow.
Navigating the complexities of additive manufacturing demands clear goals, precise material choices, and optimised CAD designs. This guide highlights the challenges of ensuring dimensional accuracy, selecting the right technology, and validating build setups—key hurdles that can delay your project and inflate costs. If achieving fast, high-quality prototypes while maintaining strict tolerances feels overwhelming, you are not alone.
WJ Prototypes specialises in overcoming these exact challenges with advanced SLA, SLS, FDM, MJF, and DMLS technologies tailored for precision prototyping. Our ISO certified manufacturing combines rapid turnaround with expert support in material selection and design optimisation. Whether you need intricate geometries or functional parts that meet demanding specs, we bring your vision to life with proven quality assurance practices. Discover how our comprehensive suite of additive manufacturing services can transform your prototyping process today.
Need a reliable partner who understands every step from defining project requirements to inspecting final parts? Visit WJ Prototypes now for a seamless quoting experience and expert guidance on your precision prototyping journey. Take action now to reduce risk and accelerate your time to market with trusted rapid manufacturing solutions.
Successful additive manufacturing begins with clear project goals and material requirements. Document your specific performance expectations by determining whether you need a functional prototype, a visual model, or an end-use part. This focus will streamline your prototyping process and help avoid costly missteps.
Choosing the right additive manufacturing technology is crucial for your project's success. Evaluate factors like part geometry, material requirements, production volume, and surface finish. Create a weighted evaluation matrix to systematically score each technology against your project needs.
Optimising your CAD designs involves assessing printability and addressing potential manufacturing challenges. Focus on simplifying complex geometries, ensuring consistent wall thicknesses, and minimising unsupported overhangs. Use specialised CAD optimisation software to identify and suggest necessary adjustments for better printability.
Preparing your build setup requires meticulous configuration of your machine settings. Pay close attention to parameters like layer thickness, print speed, and temperature, ensuring they align with your design specifications. Run test prints to validate these configurations before starting the final print job.
After manufacturing, conduct a comprehensive inspection of your parts to ensure quality compliance. Use precise measuring tools to evaluate geometric and dimensional accuracy, focusing on critical features that impact part functionality. Develop a standardised quality inspection checklist to ensure a thorough and consistent evaluation process.
SERVICES
RESOURCES


