


- Room 1807, Unit 9, Building 2, Shangxing Commercial Street, Shangde Road, Shangxing Community, Xinqiao Subdistrict, Bao'an District, Shenzhen City, China
CONTACT US

WhatsApp

Contact Us
Our team is on stand by, waiting toassist you.
Videos
A large collection of educational videos and tutorials.
About Us
Learn about our company, leadership, and mission totransform manufacturing.
Privacy Policy
Applies to all personal information collected through and/or processed in connection.

Aerospace & UAV
WJ Prototypes is your 3D manufacturing partner from prototype to large scale production.
Consumer Electronics
New Product Introduction Solutions for Consumer Electronics.

Robotics & Automation
Need some assistance bringing your robotic device or parts from the sketch-board to reality?
Medical Devices
The medical industry needs high quality, dependable and safe parts and products.
Automotive
New Product Introduction Solutions for Automotive
Industrial Machinery
The main purpose of industrial prototyping is to take the product from drawings into the real world.


Production delays and prototype flaws can stall even the most promising aerospace and automotive projects. Defining exact material and design requirements at the start is what separates efficient, high-quality fabrication from costly setbacks. This guide gives manufacturing engineers the step-by-step methods to bridge precision demands and tight schedules by focusing on the discipline of specification, equipment setup, and process control. Advanced fabrication techniques and smart material choices are key to keeping your production both competitive and reliable.
| Key Point | Explanation |
|---|---|
| 1. Define Material Needs Thoroughly | Identify functional requirements before fabrication to prevent costly design and manufacturing mistakes later on. |
| 2. Choose Advanced Machinery Wisely | Select and set up the right fabrication equipment to achieve desired precision and avoid future issues with tolerances. |
| 3. Monitor Machining Processes Carefully | Continuously check for tool wear and adhere to specifications during machining to catch defects early and maintain quality. |
| 4. Implement Rigorous Inspection Protocols | Develop a clear inspection plan to verify parts meet design specifications, preventing defective products from reaching customers. |
| 5. Prioritize Final Finishing Steps | Execute proper deburring and surface treatment processes to ensure parts perform reliably and arrive in excellent condition. |
Before you cut, machine, or cast anything, you need to understand exactly what your part must accomplish. This step defines the foundation for every decision that follows, from material selection to manufacturing method.
Start by identifying your functional requirements. What loads will the part endure? What temperatures will it experience? Does it need to resist corrosion, chemicals, or wear? For aerospace and automotive applications, these questions aren't optional—they directly impact safety and performance.
Your design specifications should address:
Balancing these factors requires understanding how material properties align with fabrication methods. A material that delivers excellent strength might be difficult to machine to tight tolerances. Another choice might cost less but require different tooling altogether.
Document your constraints clearly. Create a specification sheet that lists non-negotiable requirements separately from preferences. This discipline prevents costly mistakes later when you realize a material choice creates manufacturing bottlenecks or fails in actual use.
Your material choice doesn't exist in isolation—it determines which fabrication processes are even viable for your design.
Consider how aesthetics, usability, and sustainability fit into your decision framework. In automotive applications, surface finish quality affects both function and appearance. In aerospace, weight savings of even a few grams per part compound across thousands of units.
Research similar parts in your industry. What materials do competitors specify? What have others learned about manufacturability in your tolerance range? This intelligence costs nothing but saves months of trial and error.
Pro tip:Create a simple scoring matrix comparing candidate materials against your top 5-7 requirements—weighted by importance. This removes emotion from material selection and gives you quantifiable justification for your choice when stakeholders question the decision later.
Now that you understand your material and design requirements, it's time to configure the machinery that will bring your part to life. Equipment setup determines whether you'll achieve precision or struggle with tolerances that slip out of spec.
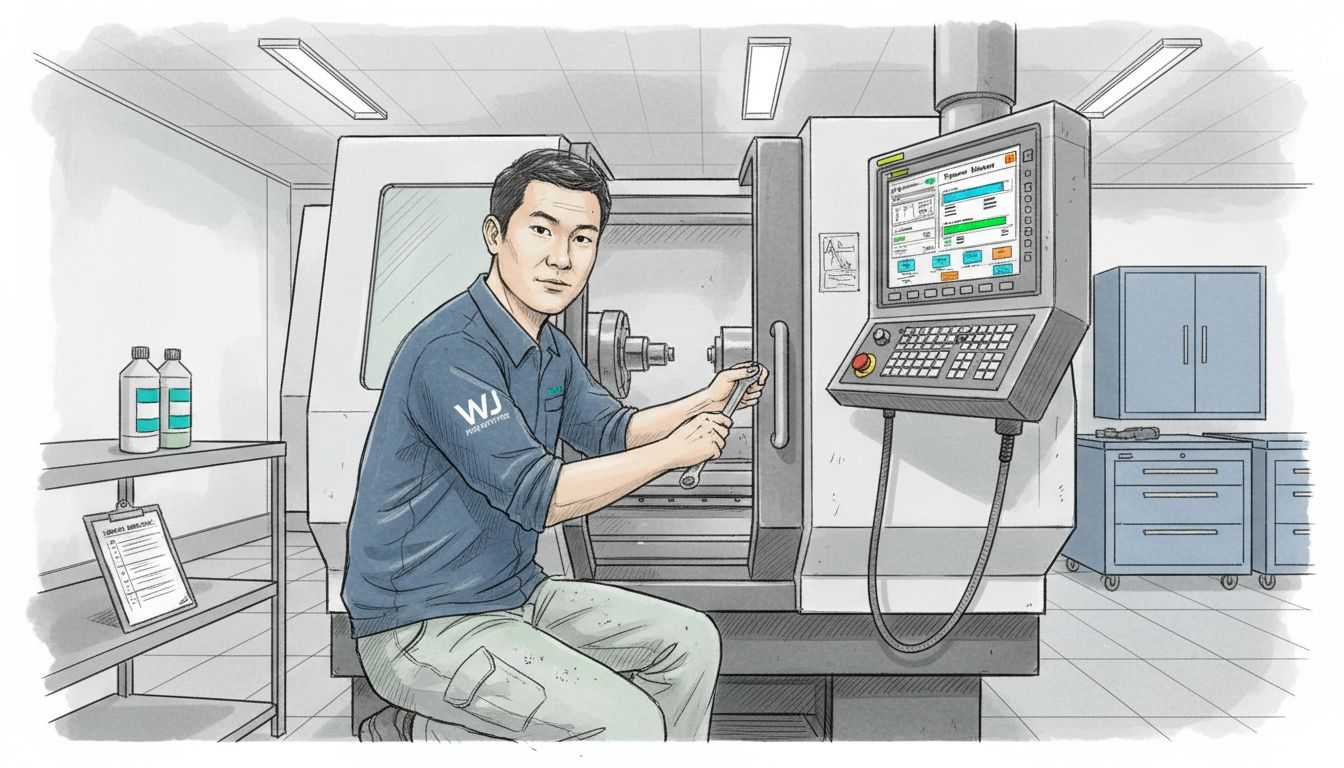
Start by selecting the right machinery for your specific needs. Your options typically include CNC machining for subtractive work, laser cutting for sheet materials, additive manufacturing for complex geometries, or robotic automation for repetitive operations. Each technology excels in different scenarios, and your material choice from Step 1 should guide this decision.
The setup process involves several critical phases:
Proper calibration is non-negotiable. A CNC machine that's even 0.001 inch out of square will compound errors across dozens of parts. Many shops run test parts on scrap material first, comparing results to your specification sheet before committing to production runs.
Advanced fabrication technologies like CNC machining and additive manufacturing require integration of computer science, materials engineering, and intelligent control systems. This means your setup extends beyond the machine itself to include the software, calibration procedures, and personnel expertise that keep everything running at peak performance.
Here's a summary comparing key advanced fabrication equipment methods:
| Method | Best Used For | Main Strength | Limitation |
|---|---|---|---|
| CNC Machining | Complex metal parts | High precision | Slow for large volumes |
| Laser Cutting | Sheet materials | Fast, clean cuts | Limited to 2D shapes |
| Additive Manufacturing | Intricate geometries | Design flexibility | Slower build rates |
| Robotic Automation | High repetition tasks | Consistent quality | High setup cost |
The difference between adequate setup and excellent setup often comes down to attention to one small detail that compounds into major quality improvements.
Consider your facility's infrastructure too. Do you have adequate power supply for high-speed spindle operation? Is your thermal environment stable enough to maintain dimensional stability? These environmental factors matter more than most engineers realize, especially when tolerances tighten to plus or minus a few thousandths.
Document your setup procedures thoroughly. Create setup sheets showing tool offsets, speeds, feeds, and coolant recommendations. This documentation pays dividends when you need to restart a production run weeks or months later.
Pro tip:Create a pre-production checklist covering machine calibration, tool installation, first-article inspection, and environmental conditions—then actually use it before every run. This simple discipline catches setup errors before they cost you parts.
This is where your design becomes reality. Execution requires focus on real-time monitoring, adaptive adjustments, and maintaining consistency across every part you produce. The difference between acceptable and exceptional parts often comes down to how carefully you manage this phase.
Start your machining run by verifying that your first part meets specification. Don't assume your setup was perfect. Run one complete part, inspect it against your design requirements, and measure critical dimensions before running a full batch. This catches setup errors before they multiply across dozens of scrap parts.
Monitor your process continuously as you work. Watch for signs of tool wear, vibration, or thermal drift. Listen to the machine sound as material comes off. An experienced operator can hear when something isn't right, but even with automation, you need smart process monitoring systems that track performance in real time.
Your execution workflow includes these key activities:
Real-time feedback prevents small problems from becoming big scrap piles.
Precision machining processes like ultra-precision milling and diamond turning demand integration of advanced controls and measurement systems. This means you're not just moving a tool through material. You're managing tolerance stacks, thermal expansion, tool deflection, and material variability simultaneously.
Take notes on what works and what doesn't. Did a specific speed produce better surface finish? Did tool life extend when you adjusted your approach angle? Build a knowledge base from each production run so future jobs benefit from your experience.
Keep parts organized and labeled throughout fabrication. Traceability matters, especially in aerospace and automotive work where you may need to prove which batch a specific part came from if issues arise later.
Pro tip:Record actual machining parameters and results for every production run, then compare them against targets. This data reveals trends before they become problems, and it gives you documented evidence of your process capability when customers ask tough questions.
You've machined the parts, but you're not done yet. Inspection separates marginal work from excellence. This step confirms that every part actually meets your design requirements and catches defects before they reach your customer.
Start with a clear inspection plan based on your design specifications. Which dimensions are critical to function? Which surface finishes matter most? Which features require 100% inspection versus statistical sampling? Your answers determine how you allocate inspection resources and what tools you'll need.
Inspection encompasses measuring geometric characteristics, surface quality, and functional performance. Measuring geometric and surface characteristics requires appropriate tools matched to your tolerance requirements. Coordinate Measuring Machines handle complex geometry. Surface profilers check finish quality. Non-destructive testing like ultrasonic or X-ray inspection reveals internal defects without destroying parts.
Your inspection workflow should include:
One part that slips through with a defect costs far more than the time to inspect it properly.
Best practices in precision parts inspection emphasize defining inspection standards early, tailoring methods to your specific materials and functions, and leveraging both automated and manual techniques. This integrated approach catches defects while maintaining efficiency across your production volume.
Document everything. Record which parts passed, which failed, and why. Build a failure database so you can identify root causes. Was the defect a design issue, a material problem, a setup mistake, or operator error? Understanding the cause prevents repeat failures.
If you find defects, stop production and investigate before running more parts. A quick adjustment now saves scrap later. Sometimes defects indicate your process capability doesn't match your design tolerances, and you need to reconsider your approach.
Pro tip:Create a simple inspection checklist specific to each part type, then photograph passing examples and failing examples. When new team members join, they have visual references showing exactly what acceptable looks like versus what gets rejected.
Your parts have passed inspection, but they're not ready for your customer yet. Finishing operations transform functional parts into polished components that perform reliably in the field. This final step protects your investment and ensures parts arrive in perfect condition.
Begin with deburring and surface preparation. Sharp edges and burrs left from machining can cause injuries, create stress concentrations, or interfere with assembly. Hand deburring works for small quantities, but vibratory finishing or media blasting handles larger batches more efficiently. Remove all chips, coolant residue, and contaminants thoroughly.
Next, apply appropriate surface treatments and coatings based on your design requirements. Finishing operations like surface treatment and coating enhance both functionality and aesthetics. Aerospace parts often need anodizing or specialized protective coatings. Automotive components may require passivation or painting. Medical devices demand biocompatible finishes. Each material and application has specific requirements.
Your finishing workflow includes:
Finishing isn't cosmetic—it's functional protection that directly impacts part performance and longevity.
Now prepare for delivery. Protective packaging and logistics management ensure parts reach customers intact and on schedule. Use cushioning materials appropriate to your part weight and fragility. Include documentation showing inspection results, material certifications, and traceability information. Label boxes clearly with part numbers, quantities, and any special handling requirements.
Use this table to quickly review part finishing and delivery considerations:
| Finishing Step | Purpose | Common Issues Prevented |
|---|---|---|
| Deburring | Remove sharp edges | Avoid injury, improve assembly |
| Surface Treatment/Coating | Protect and enhance part | Prevent corrosion/wear |
| Thorough Cleaning | Eliminate residue | Prevent contamination |
| Protective Packaging | Ensure safe delivery | Avoid transit damage |
Coordinate with your logistics partner to confirm delivery dates and methods. For aerospace and automotive customers, on-time delivery is as critical as part quality. Communicate proactively if delays occur so your customer can adjust their production schedule.
Final step: confirm receipt with your customer and collect feedback. Ask if the parts performed as expected. Document any issues for continuous improvement. Build relationships that lead to repeat business.
Pro tip:Create a finishing specification sheet for each part type that documents deburring requirements, coating type and thickness, cure times, and packaging needs. This becomes your standard operating procedure, ensuring consistency across all production runs and reducing errors.
Mastering each step of precision part fabrication demands deep expertise in design requirements, advanced equipment setup, precise machining, thorough inspection, and finishing. If you have struggled with balancing tight tolerances, material properties, or consistent quality control your challenges are not unique. You want high quality parts that perform reliably in aerospace, automotive, or industrial applications without endless trial and error or costly delays.
WJ Prototypes understands these critical pain points. We offer comprehensive manufacturing services including CNC machining, additive manufacturing, and precision finishing to deliver parts that meet your exact specifications every time. Our experienced engineers and ISO-certified processes ensure your fabrication workflow—from initial material selection through inspection and final delivery—flows smoothly and efficiently. Partnering with us means access to cutting-edge technology and quality assurance that eliminates uncertainty and accelerates your product development.
Ready to transform your fabrication process into one that consistently produces superior precision parts? Contact WJ Prototypes now to explore our range of advanced manufacturing solutions. Get an instant quote and experience how professional expertise combined with rapid prototyping and traditional fabrication services can help you meet your demanding project goals on time and within budget.
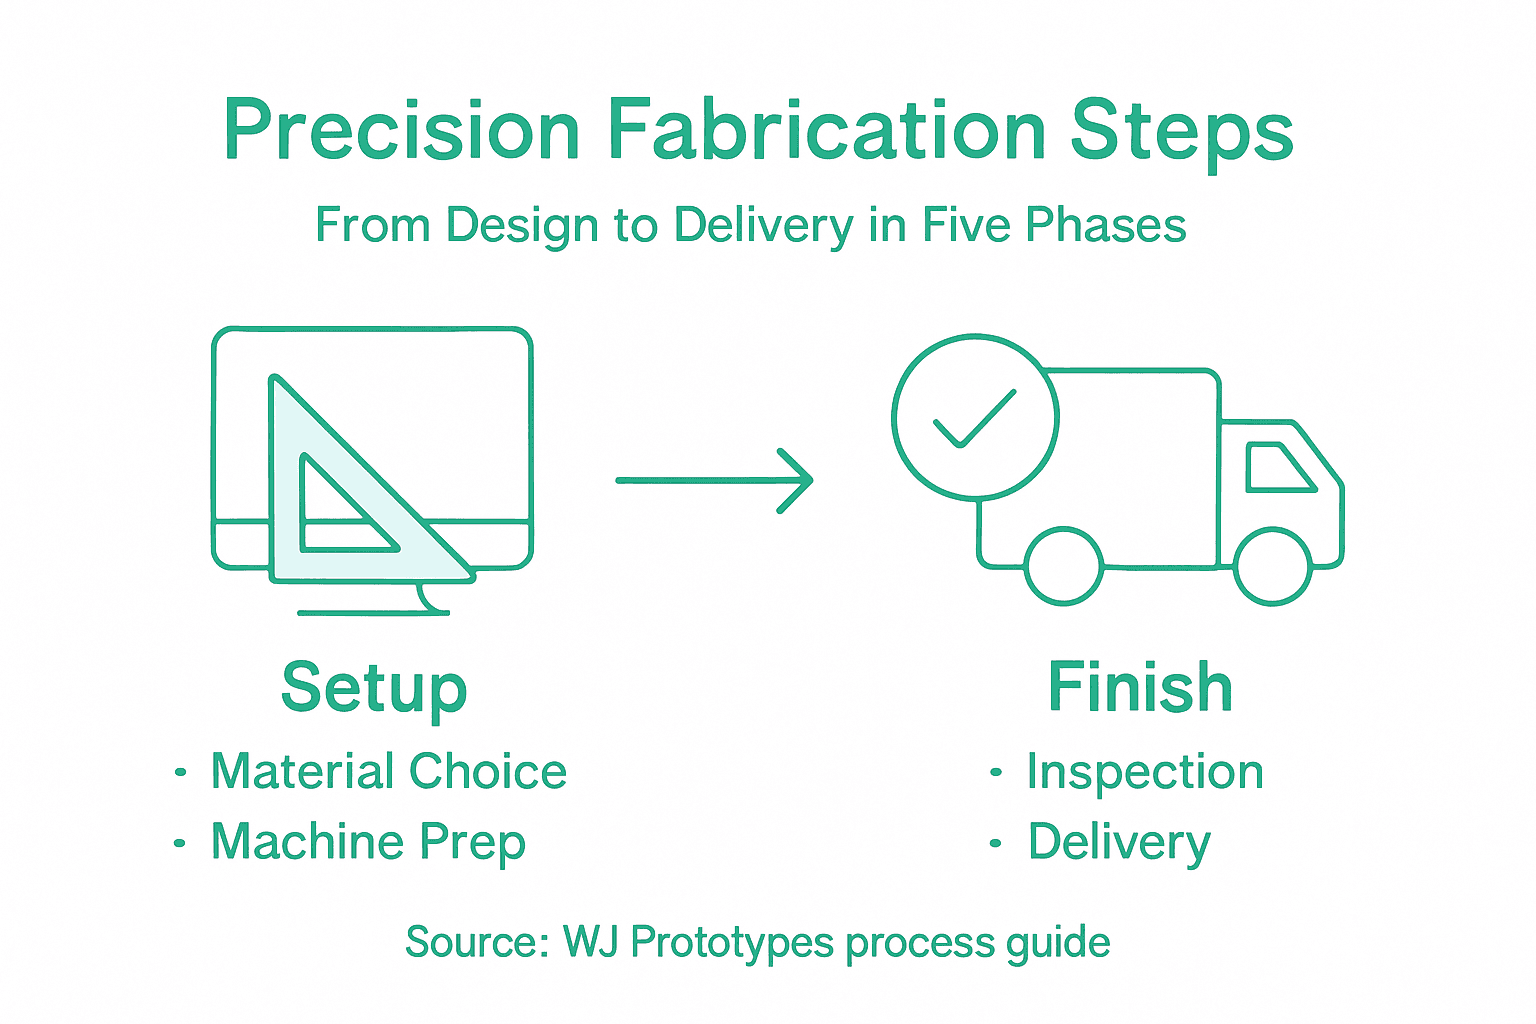
The precision part fabrication process involves five key steps: establishing material and design requirements, setting up advanced fabrication equipment, executing precision machining and fabrication, performing thorough inspection and testing, and finalizing part finishing and delivery. Follow these steps sequentially to ensure high-quality parts that meet your specifications.
To determine the right material, start by identifying your functional and design requirements, including mechanical properties and environmental factors. Create a scoring matrix to compare potential materials against your top priorities, and document your constraints to avoid costly mistakes during production.
Your inspection plan should specify which dimensions, surface finishes, and functional performances are critical to your design. Use appropriate measurement tools and decide on full inspection versus statistical sampling based on the part's importance to ensure quality control.
To ensure consistent quality, continuously monitor your machining process for tool wear and dimensional accuracy. Take detailed notes on machining parameters and adjustments during production runs to build a knowledge base that improves future operations.
Before delivering precision parts, perform essential finishing steps such as deburring, thorough cleaning, and applying protective coatings. These steps enhance the part's functionality and ensure it arrives at the customer in optimal condition.
Improve communication by proactively confirming delivery dates and discussing any potential delays with your customers. Provide documentation that includes inspection results and material certifications to build trust and transparency in your processes.
What Is Precision Machining and Why Accuracy Matters
Precision Machining in China | Why China Leads Global Production
Sheet Metal Fabrication 101 | Step-by-Step Guide for Precision Parts
Precision CNC Machining in China | Fast, Flexible & Reliable Manufacturing
SERVICES
RESOURCES


