



- Room 1807, Unit 9, Building 2, Shangxing Commercial Street, Shangde Road, Shangxing Community, Xinqiao Subdistrict, Bao'an District, Shenzhen City, China
CONTACT US

WhatsApp


Contact Us
Our team is on stand by, waiting toassist you.

Videos
A large collection of educational videos and tutorials.

About Us
Learn about our company, leadership, and mission totransform manufacturing.

Privacy Policy
Applies to all personal information collected through and/or processed in connection.

Aerospace & UAV
WJ Prototypes is your 3D manufacturing partner from prototype to large scale production.

Consumer Electronics
New Product Introduction Solutions for Consumer Electronics.

Robotics & Automation
Need some assistance bringing your robotic device or parts from the sketch-board to reality?

Medical Devices
The medical industry needs high quality, dependable and safe parts and products.

Automotive
New Product Introduction Solutions for Automotive

Industrial Machinery
The main purpose of industrial prototyping is to take the product from drawings into the real world.
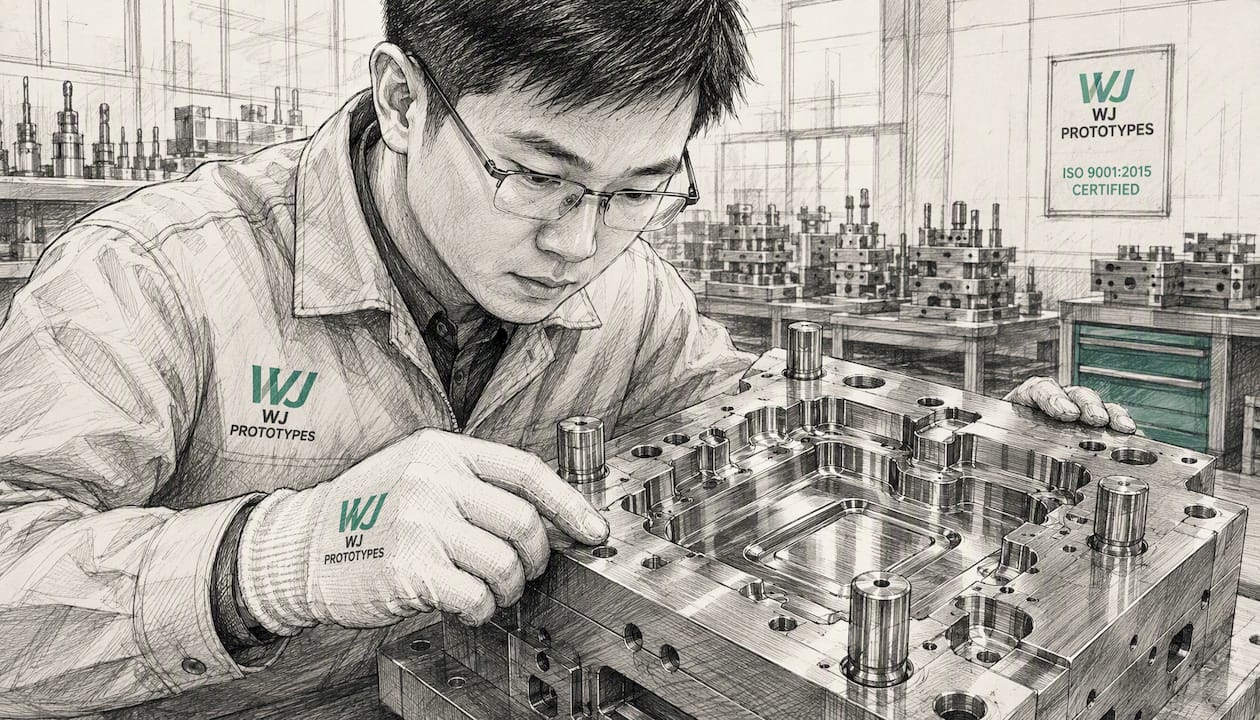

Expect a prototype injection mold to run between $3,000 and $20,000 for tooling, with per-part costs that drop sharply once you cross roughly 50 units. An aluminum prototype mold (SPI Class 105) typically lands in the $3,000–$8,000 range and delivers 2,000–10,000 shots, while a soft-steel P20 bridge mold runs $8,000–$20,000 and can handle up to 100,000 shots. Per-part variable costs depend heavily on resin, shot size, and cycle time, but a simple molded part in a commodity resin often runs $1–$5 per part at low volumes once tooling is amortized across the run.
Three variables move the quoted number more than anything else:
WJ Prototypes offers prototype and low-volume injection molding with global delivery, ISO-certified processes, and an instant-quote system that lets you plug in your CAD and target resin before committing to tooling spend.
Prototype injection molding costs are driven primarily by tooling type, part complexity, and run quantity, with aluminum tooling at $3,000–$8,000 offering the best balance of cost, speed, and production-grade material fidelity for most US engineering programs.
| Point | Details |
|---|---|
| Tooling cost ranges | Aluminum molds run $3,000–$8,000; soft-steel P20 bridge molds run $8,000–$20,000. |
| The 50-part sweet spot | Below 50 units, 3D printing is usually cheaper; above 50, injection molding wins on per-part cost. |
| Biggest cost driver | Part complexity (undercuts, side-actions, tight tolerances) moves tooling cost more than any other variable. |
| Top DFM check | Add 1–2° draft to all vertical walls and keep wall thickness consistent before submitting for tooling. |
| WJ Prototypes | Offers ISO-certified aluminum and soft-steel prototype tooling with DFM review and instant quoting for US customers. |
The total cost of a prototype injection-molding program is not just the mold price. It follows a straightforward formula:
Understanding where each dollar goes is the fastest way to find savings before you sign a purchase order.
Tooling is the largest single line item for any prototype run. The main cost drivers inside the mold itself are:
Injection-molding cost calculators require five core inputs to estimate per-part cost: shot weight (grams), material price per kilogram, cycle time (seconds), machine hourly rate, and scrap rate.
| Cost Component | Typical Range | Notes |
|---|---|---|
| Aluminum prototype tooling | $3,000–$8,000 | Single cavity, simple geometry |
| Soft-steel (P20) bridge mold | $8,000–$20,000 | Extended test runs, bridge production |
| Hardened steel production mold | $15,000–$80,000+ | High-volume; not a prototype tool |
| Per-part material cost (commodity resin) | $0.10–$0.80 | Depends on shot weight and resin grade |
| Machine time per part | $0.30–$2.00 | Based on cycle time and press size |
| Secondary ops and finishing | $1–$5 | Deflashing, painting, assembly |
| Mold modification (incremental change) | $500–$3,000 | Complex revisions add time and cost |
Published guides recommend separating tooling amortization from per-part variable costs in your budget model. Blending them into a single “per-part” figure hides the true economics and makes it impossible to see how cost changes with volume.
Choosing the wrong mold material is the most expensive mistake a product team can make at the prototype stage. Here is how the four main options stack up.
Printed molds (typically in high-temperature resin or filled nylon) cost a few hundred dollars and can be ready in days. They work for form-fit checks and very-low-volume runs of 50–200 shots in softer resins like PP or PE. The tradeoff is real: benchtop and printed-mold systems do not reliably match production-grade material fidelity, surface finish, or dimensional tolerance. If your test requires authentic mechanical properties or regulatory-grade samples, a printed mold will not get you there.
Best for: Early form-fit validation, internal design reviews, non-functional mockups.
This is the workhorse of prototype injection molding. At $3,000–$8,000, an aluminum tool delivers 2,000–10,000 shots and accepts production-grade resins, including engineering polymers like PEEK, Nylon 66, and glass-filled PP. Lead time runs roughly 2–4 weeks. For medical, automotive, or electronics teams that need functional test samples with real material properties, aluminum tooling is the standard starting point.

Pros: Lower cost than steel, fast machining, accepts most production resins, good for design iteration. Cons: Limited shot life, softer surface wears under abrasive resins, not suitable for very tight tolerances on high-cycle features.
P20 bridge molds run $8,000–$20,000 and support up to 100,000 shots, making them the right choice when you need more than a few hundred test parts or plan to use the mold for low-volume bridge production while the production tool is being built. Lead time is typically 4–8 weeks. The higher upfront cost amortizes well across larger prototype batches and eliminates the risk of a worn aluminum tool mid-program.
Pros: Long mold life, handles abrasive and high-temperature resins, suitable for bridge production. Cons: Higher tooling cost, longer lead time than aluminum.
At $15,000–$80,000+ with 8–20 week lead times and mold lives of 500,000 to 1,000,000+ shots, hardened steel tools are production assets, not prototype tools. The only reason to go here at the prototype stage is if regulatory requirements demand production-equivalent tooling for sample submission, which is rare.
| Tooling Type | Typical US Cost | Mold Life (shots) | Lead Time | Best For |
|---|---|---|---|---|
| 3D-printed mold | $200–$1,500 | 50–500 | 1–5 days | Form-fit checks, very early design |
| Aluminum (SPI Class 105) | $3,000–$8,000 | 2,000–10,000 | 2–4 weeks | Functional testing, regulatory samples |
| Soft steel P20 | $8,000–$20,000 | Up to 100,000 | 4–8 weeks | Bridge production, extended test runs |
| Hardened steel (Class 101–103) | $15,000–$80,000+ | 500,000 to 1,000,000+ | 8–20 weeks | Full production |

When to upgrade from aluminum to soft steel: If your test plan requires more than 2,000 parts, if you are running an abrasive resin (glass-filled, carbon-filled), or if the prototype mold will double as a bridge production tool, move to P20. The cost delta is recoverable; a worn aluminum tool mid-program is not.
A reproducible estimate takes about 30 minutes with the right inputs. Here is the method, followed by a worked example.
Assumptions: single-cavity aluminum mold, ABS resin, simple geometry, no side-actions, SPI B2 finish.
At 500 units, the same tooling amortizes to $10.00/part, dropping total per-part cost to roughly $10.81. That math is why quantity is the most powerful lever in prototype injection molding pricing.
Pro Tip: Build this worksheet in a spreadsheet with quantity as a variable input. Showing procurement the per-part cost curve from 50 to 500 units in a single chart is far more persuasive than a single quoted price, and it makes the case for committing to a slightly larger run.
Injection-molding cost calculators use exactly these inputs. Running your numbers through one before requesting a formal quote gives you a sanity check and a stronger negotiating position. For a deeper look at how workflow steps affect the final bill, the injection molding workflow guide at WJ Prototypes walks through each stage.
The crossover point is roughly 50 parts, but that number is not fixed.
Below a few dozen units, 3D printing (SLA, SLS, or MJF) almost always wins on total program cost because there is no tooling investment to recover. CNC machining sits in a similar position for metal or high-tolerance polymer parts at very low quantities. Above that quantity, the tooling amortization math flips, and injection molding produces lower per-part cost with identical mechanical properties when using aluminum or soft-steel prototype tooling.
The 50-part threshold shifts in several directions depending on your situation:
For very-low-volume form-fit checks (under 20 parts), benchtop injection systems offer a low-cost entry point, but they trade production-grade fidelity for that lower price. They are useful for checking geometry, not for functional or regulatory testing.
When you are deciding whether to move from prototyping to small-batch production, the economics of small-batch manufacturing follow the same amortization logic: fixed tooling costs spread across more units, and per-unit cost falls predictably.
Pro Tip: If your design is still changing, do not commit to injection molding tooling yet. Run 3D-printed iterations until the geometry is stable, then cut the mold. Every design change after tooling is cut costs $500–$3,000 and adds days or weeks.
Design-for-manufacturability errors are the leading cause of unexpected tool rework and budget overruns at the prototype stage. Most of them are fixable in CAD before the mold is ever cut.
Parts with less than 1° of draft on vertical walls create ejection problems. The mold maker compensates by polishing the cavity to a mirror finish, adding $500–$1,500 to the tooling bill, or the part sticks and scrap rates climb. Fix: Add 1–2° of draft to all vertical walls as a default. Increase to 3–5° for textured surfaces.
Thick-to-thin transitions cause sink marks, warpage, and extended cycle times. Fix: Target uniform wall thickness (typically 1.5–3mm for most engineering resins) and use coring to reduce thick sections rather than adding material.
Part geometry and undercuts are primary drivers of mold complexity and price. Each side-action or slide adds $500–$2,000 to the tooling cost and introduces a maintenance point that can fail mid-run. Fix: Redesign undercuts as through-holes, slots, or living hinges where function allows. When an undercut is unavoidable, discuss with your mold engineer whether a hand-loaded insert is cheaper than a full side-action for prototype quantities.
Specifying ±0.05mm on a cosmetic boss that serves no mating function forces the mold maker into slow EDM passes and post-machining. That adds hours and cost with zero functional benefit. Fix: Apply tight tolerances only to mating interfaces and functional surfaces. Use ±0.1–0.2mm as the default for non-critical features on prototype tooling.
Thin ribs under 0.8mm are difficult to fill and prone to short shots. Rib thickness should match the nominal wall or be slightly less.
Pro Tip: Request a DFM review from your mold engineer before tooling is approved. A 2-hour review that catches two side-actions and a tolerance stack-up can save $3,000–$5,000 in tooling cost and two weeks of schedule. Most suppliers, including WJ Prototypes, include DFM review as part of the quoting process.
For a detailed look at achieving dimensional accuracy through design choices, the injection molding accuracy guide covers the specific techniques manufacturing engineers use.
Lead time is where prototype programs most often go wrong, and the cause is almost always a late design change or an underestimated finishing step.
Typical US-market lead times by tooling type:
The three most common causes of delay are late design changes after tooling is approved, requests for high-polish or custom texture finishes that were not scoped in the original quote, and material lead times for specialty resins. A resin like PEEK or PEI may have a 2–4 week procurement lead time that sits entirely outside the mold-making schedule.
One mitigation that works consistently: freeze the design before requesting tooling quotes. Teams that submit a “quote-ready” CAD file with draft analysis complete and tolerances reviewed cut their DFM revision cycles from three rounds to one.
Most cost reduction in prototype injection molding happens before the purchase order, not after.
For design-validation prototypes where speed matters more than unit economics, domestic or near-shore sourcing often wins. For bridge production runs where cost per part drives the decision, overseas tooling from an ISO-certified supplier is worth evaluating. The cost and lead-time comparison between domestic and overseas injection molding is covered in detail for teams weighing that tradeoff.
Pro Tip: When negotiating mold changes, structure your change orders with a clear scope statement before work begins. An open-ended “fix the undercut” instruction can turn a $500 change into a $2,500 one. Require a written cost and lead-time estimate for every change before approving it.
The practical case for aluminum prototype tooling rests on a straightforward empirical point: parts molded in aluminum tools using production-grade resins have the same mechanical properties as parts from production steel tools. The material does not know what kind of mold it was injected into.
Aluminum prototype molds (SPI Class 105) produce parts with production-grade mechanical properties when run with production resins, making them suitable for functional, regulatory, and field testing at a fraction of the cost of hardened steel tooling. At $3,000–$8,000 per tool, they represent the most cost-effective path to authentic injection-molded test samples for most engineering programs.
That is the core argument for prototype injection molding over 3D printing for functional test samples. A 3D-printed part in SLA resin is not the same as a molded part in glass-filled nylon, regardless of how similar they look. When your test protocol requires production-equivalent material behavior, aluminum tooling is the minimum viable option.
The advantages of injection-molded prototypes for functional testing and production validation are well-documented for teams in medical, automotive, and electronics applications where material fidelity is non-negotiable.
The 50-part break-even threshold holds for most standard geometries and commodity resins. It shifts upward (toward 100–200 parts) when part complexity drives tooling cost above $10,000, and it shifts downward (toward 20–30 parts) when material fidelity requirements rule out 3D printing entirely. For a budget justification, the rule of thumb an engineer can cite is: if you need more than 50 parts or production-grade material properties, injection molding with aluminum tooling is the right call.
Getting an accurate quote for a prototype injection-molding program comes down to the quality of the specification you submit. The teams that get sharp, reliable quotes are the ones that arrive with a finalized CAD file, a target resin (or a short list of two), a stated quantity range, and a clear note on which tolerances are functional and which are reference dimensions.
WJ Prototypes runs an ISO-certified process with experienced manufacturing engineers who conduct DFM reviews as part of the quoting workflow. That review catches the side-actions, draft issues, and wall-thickness problems that inflate tooling cost before the mold is ever cut. The instant-quote system accepts CAD uploads directly, so you can get a ballpark figure in hours rather than waiting days for a sales call.
For US customers, WJ Prototypes offers aluminum prototype tooling, soft-steel bridge molds, and full production tooling, with global delivery and sample turnaround that fits most engineering program schedules. The material breadth covers commodity resins through engineering polymers, so you are not forced to substitute a test resin when the production material is what you actually need.
Before requesting a quote, prepare: your CAD file with draft analysis complete, your target resin and any regulatory material requirements, your expected quantity (prototype run and any planned follow-on), and your critical tolerances called out separately from reference dimensions. That package cuts quoting time and eliminates the back-and-forth that delays program starts.
Budgeting a prototype injection-molding program is straightforward when you have the right tooling cost ranges, a clear per-part formula, and a supplier who reviews your design before the mold is cut.

WJ Prototypes delivers ISO-certified prototype and low-volume injection molding with aluminum and soft-steel tooling, a broad material library covering everything from ABS and PP to PEEK and glass-filled nylon, and an instant-quote system that gives you a real number fast. DFM review is included in the quoting process, which means cost surprises get caught before tooling is approved, not after. Whether you need 50 functional test samples or a 500-part bridge run, the process starts with your CAD file and a target resin. Get a quote for your injection molding project or review the materials available for injection molding to confirm your resin is supported before you submit.
Aluminum prototype molds typically cost $3,000–$8,000 for a single-cavity tool with simple geometry; soft-steel P20 bridge molds run $8,000–$20,000. Hardened steel production molds start at $15,000 and can exceed $80,000 for complex multi-cavity tools.
Multiply shot weight (kg) by resin price ($/kg) for material cost, then add machine time per part based on cycle time and machine hourly rate, scrap allowance, and secondary operations. Divide total tooling cost by planned quantity and add that amortized figure to get total per-part cost.
The break-even point is roughly 50 parts for standard geometries in commodity resins. Complex parts with expensive tooling push that threshold to 100–200 units; material fidelity requirements for regulatory testing can make injection molding the right choice at quantities as low as 20–30 parts.
Per-part margins improve significantly with volume because tooling cost is fixed. A mold that costs $5,000 amortizes to $25/part at 200 units but only $1/part at 5,000 units, so profitability scales sharply with run size once tooling is paid for.
Submit a finalized CAD file with draft analysis complete, specify your target resin and quantity range, and call out functional tolerances separately from reference dimensions. That package eliminates most back-and-forth and typically produces an accurate quote quickly from a supplier like WJ Prototypes.
SERVICES
RESOURCES