


- Room 1807, Unit 9, Building 2, Shangxing Commercial Street, Shangde Road, Shangxing Community, Xinqiao Subdistrict, Bao'an District, Shenzhen City, China
CONTACT US

WhatsApp

Aerospace & UAV
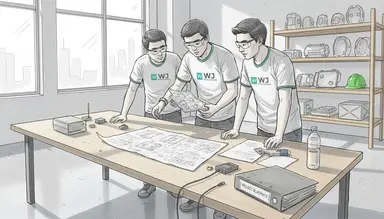
WJ Prototypes is your 3D manufacturing partner from prototype to large scale production.
Consumer Electronics
New Product Introduction Solutions for Consumer Electronics.

Robotics & Automation
Need some assistance bringing your robotic device or parts from the sketch-board to reality?
Medical Devices
The medical industry needs high quality, dependable and safe parts and products.
Automotive
New Product Introduction Solutions for Automotive
Industrial Machinery
The main purpose of industrial prototyping is to take the product from drawings into the real world.

Every Canadian or British product engineer knows the risk of costly design changes discovered too late in development. Industrial prototyping is not just about making a first model—it is your critical tool for bridging the gap between design ambition and manufacturing reality. By applying core principles such as experimentation and learning, you can identify flaws, test assumptions, and validate concepts while keeping both costs and timelines under control. This guide gives you a clear path to smarter prototyping decisions in aerospace and automotive engineering.
| Point | Details |
|---|---|
| Importance of Prototyping | Industrial prototyping is essential for validating design concepts, allowing for rapid testing and iteration before full-scale manufacturing. |
| Fidelity Levels | Selecting the right fidelity level for prototypes — low, mid, or high — optimally addresses specific design questions and controls costs. |
| Method Selection | Choose appropriate prototyping methods based on project needs to ensure effective learning while minimising wasteful spending. |
| Structured Process | A systematic approach from defining requirements to physical validation is crucial to efficiently manage time and resources in prototyping. |
Industrial prototyping is far more than simply building a mock-up or early version of your product. It is a structured, purposeful process designed to validate your design concept before committing to full-scale manufacturing. At its core, industrial prototyping bridges the gap between your initial design vision and manufacturing reality. It allows you to test assumptions, identify flaws, and iterate rapidly without the expense and delay of retooling production facilities. For product engineers in aerospace and automotive sectors, this distinction matters enormously: a well-executed prototype can reveal critical issues in aerodynamics, structural integrity, or thermal performance that would otherwise remain hidden until far more costly stages of development.
The fundamental purpose of prototyping rests on several interconnected principles. First, prototypes serve as vehicles for experimentation and learning. They transform theoretical calculations and CAD models into tangible objects you can physically evaluate. Second, prototyping processes involve iterative testing and validation to understand user needs and reduce the risk of costly design changes downstream. When you test a prototype, you gather real-world feedback that abstract analysis cannot provide. Third, prototypes function as communication tools within your engineering team and across departments. A 3D-printed example communicates design intent far more effectively than technical drawings alone. Finally, prototypes establish quality benchmarks and validate that your design meets essential criteria: structural safety, functional performance, material suitability, and manufacturability. In aerospace applications, for instance, prototype testing might reveal stress concentrations or vibration resonance issues that require design refinement before tooling costs escalate exponentially.
Understanding fidelity levels proves crucial when planning your prototyping strategy. Low-fidelity prototypes prioritise speed and cost efficiency, capturing the essence of your design concept through simplified geometry or placeholder materials. Mid-fidelity prototypes introduce greater accuracy in specific functional areas whilst maintaining practical development timescales. High-fidelity prototypes closely mirror final production specifications, including final materials, surface finishes, and assembly methods. The level of fidelity you require depends entirely on what questions your design needs answered. An automotive engineer validating engine mounting loads might employ high-fidelity aluminium prototypes through CNC machining, whilst validating exterior aesthetic lines could start with low-fidelity 3D-printed models. This staged approach, combining prototyping in product design across multiple iterations, compresses development timelines substantially whilst controlling costs. Your prototyping investment becomes strategic rather than wasteful when fidelity levels align precisely with the specific questions driving each development phase.
To clarify how prototype fidelity impacts development, consider this summary of each level:
| Fidelity Level | Typical Usage | Advantages | Limitations |
|---|---|---|---|
| Low-Fidelity | Concept exploration | Fast, low-cost iterations | Lacks realistic material behaviour |
| Mid-Fidelity | Functional validation | Balances detail and speed | Limited in full performance testing |
| High-Fidelity | Pre-production testing | Accurate, real-world validation | Time-consuming, higher costs |
Pro tip: Define precisely what technical questions or design unknowns each prototype must answer before committing to production, then select only the fidelity level necessary to generate that specific insight.
Prototyping methods vary dramatically depending on what you need to learn from your prototype and how much time and budget you have available. The selection of prototyping technique is not arbitrary—it directly impacts your ability to gather meaningful feedback and make confident design decisions. Prototyping methods range from simple sketches to fully functional models, each serving distinct purposes within your product development cycle. For aerospace and automotive engineers, understanding when to deploy each method can compress development timelines by months whilst revealing critical design flaws before expensive tooling investments. The choice between a rapid prototype and a production-representative prototype fundamentally shapes your learning outcomes and your path forward.
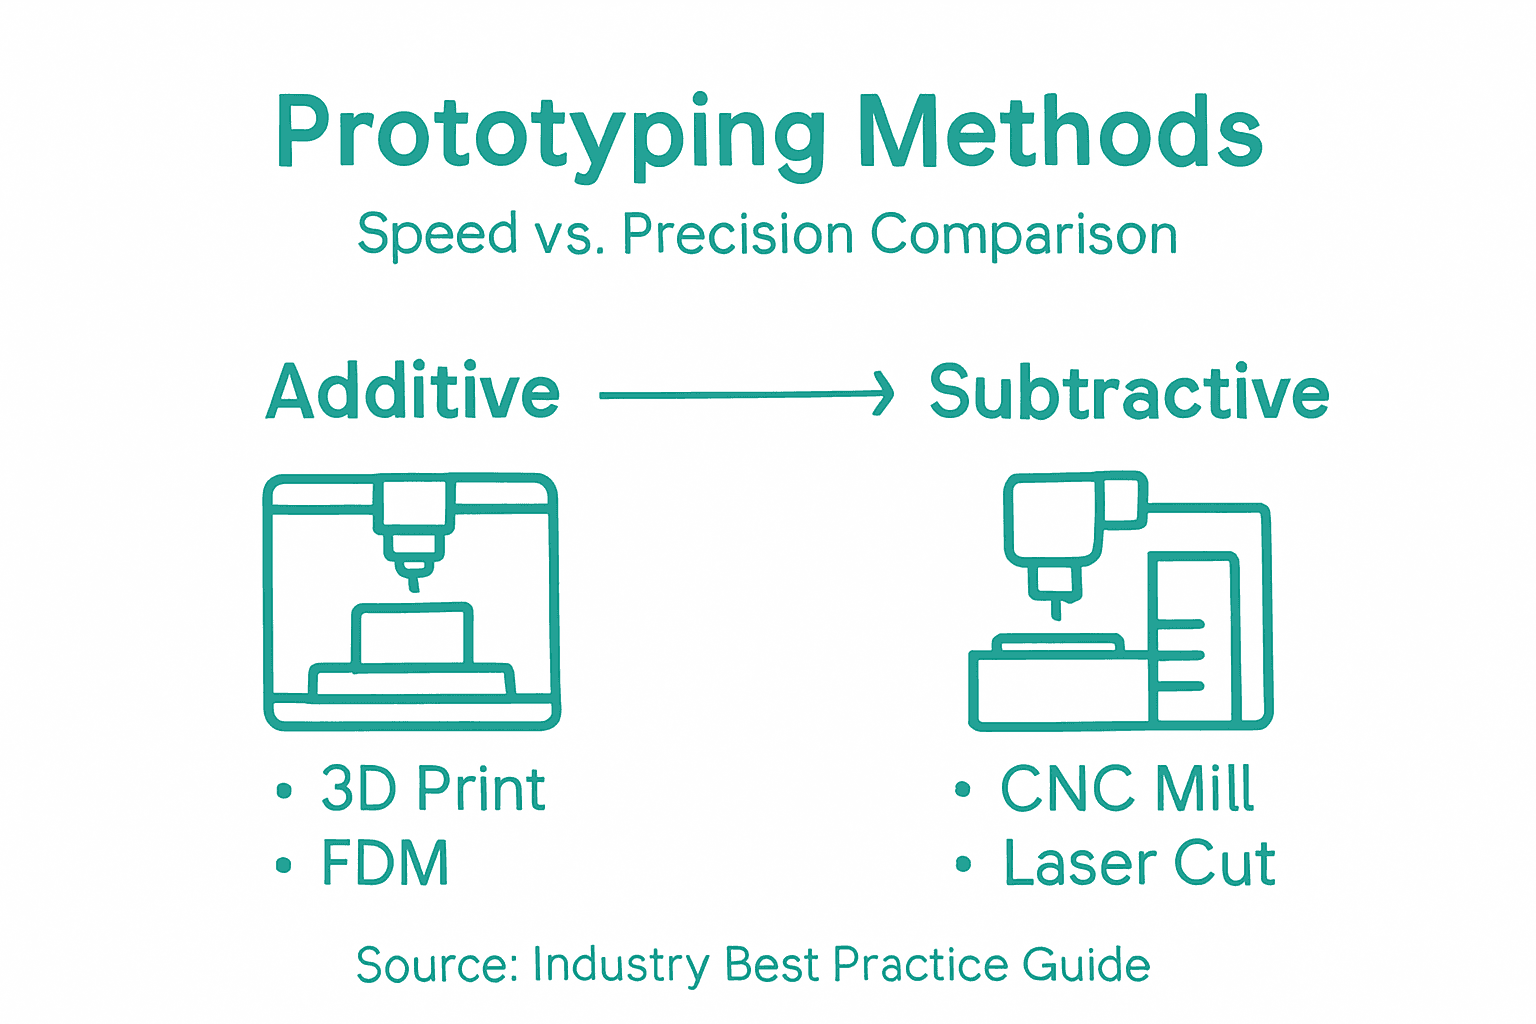
Physical prototyping methods dominate industrial applications because they deliver tangible feedback that digital models cannot provide. Additive manufacturing techniques—including 3D printing technologies such as selective laser sintering (SLS), stereolithography (SLA), and direct metal laser sintering (DMLS)—excel at producing complex geometries rapidly and cost-effectively. These methods work brilliantly for exploratory prototypes where you're testing form factors, internal geometry, or assembly logic without requiring final material properties. CNC machining approaches deliver superior dimensional accuracy and material authenticity when validating structural performance, thermal characteristics, or functional interfaces. Vacuum casting and injection moulding prototypes provide production-representative parts with correct material behaviour, essential when you need to validate real-world performance before committing to expensive tooling. Sheet metal fabrication produces accurate structural prototypes for aerospace skin panels, brackets, and enclosures. Die casting prototypes demonstrate how complex geometries perform under production conditions. The critical insight here is that selection must align with your specific validation needs—using DMLS to prototype exterior surfaces wastes resources, whilst using 3D printing to validate critical stress-bearing components risks drawing false conclusions about performance.
Digital and hybrid methods complement physical prototypes by addressing specific questions your team needs answered. Virtual prototyping through finite element analysis (FEA) simulations predicts structural behaviour, thermal performance, and fluid dynamics before committing physical prototypes to manufacturing. Interactive digital mockups communicate user experience and functionality across distributed teams. Software simulations validate operational logic and control algorithms. Strategic selection of methods based on project needs becomes your competitive advantage—most successful automotive and aerospace programmes combine multiple prototyping approaches in sequence. You might begin with FEA simulation to explore structural concepts, progress to low-fidelity 3D-printed assembly mockups to validate geometry and fit, then produce high-fidelity CNC-machined prototypes using final materials to confirm performance specifications. This staged approach manages risk whilst controlling cost. Each prototype answers specific questions before you move to the next phase, ensuring no resources are wasted on learning what you already understand.
The practical reality of industrial prototyping is that no single method answers all questions. Aerospace engineers validating engine mounting loads employ FEA simulation combined with high-fidelity metallic prototypes tested under actual loads. Automotive teams exploring dashboard ergonomics and material finishes might use vacuum-cast polyurethane samples before investing in injection moulded production tools. Medical device engineers validate both functional performance through multiple prototype iterations and biocompatibility through material-specific testing. The principle remains consistent: match your prototyping method to the specific technical question requiring an answer, then proceed to the next phase only when that question is resolved with sufficient confidence.
Pro tip: Map each prototype iteration to a specific design question or risk area you need to resolve, then select the minimum method necessary to generate that answer—this approach maximises learning while minimising both cost and schedule delays.
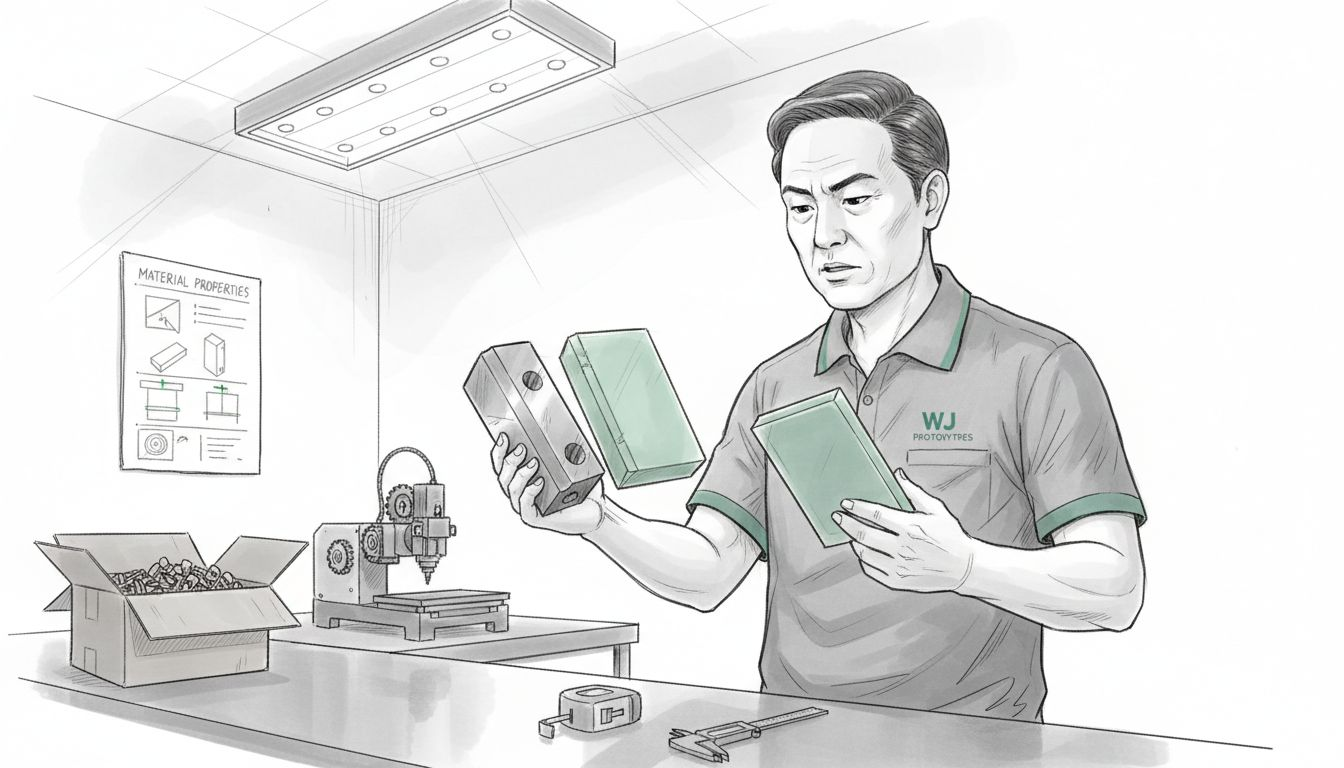
The technology you select for prototyping and the materials you choose work together as interconnected decisions that determine whether your prototype will deliver reliable feedback. You cannot simply pick a fabrication method without considering material constraints, nor can you specify a material without understanding the capabilities and limitations of the manufacturing process. For aerospace and automotive engineers, this interplay becomes critical when validating performance characteristics that depend entirely on material properties. An aluminium prototype produced through CNC machining will behave fundamentally differently from a resin-printed prototype of identical geometry, providing completely different insight into structural stiffness, thermal behaviour, and fatigue resistance. Understanding which technology paired with which material answers your specific design questions separates productive prototyping from expensive learning mistakes.
Additive manufacturing technologies dominate rapid prototyping because they compress production timescales from weeks to days and accommodate design complexity that conventional subtractive methods cannot achieve cost-effectively. Additive manufacturing processes produce complex geometries through layer by layer material addition, enabling internal cooling channels, organic shapes, and lattice structures impossible to machine. Stereolithography (SLA) uses photopolymer resins to produce high-resolution parts with smooth surfaces suitable for aesthetic evaluation and functional testing of small features. Selective laser sintering (SLS) fuses nylon powder into robust parts with excellent mechanical properties and chemical resistance. Direct metal laser sintering (DMLS) produces functional metallic prototypes from titanium, aluminium, stainless steel, and cobalt chrome alloys, enabling thermal and structural validation using production materials. Multijet fusion (MJF) delivers rapid production of nylon parts with superior dimensional consistency. Fused deposition modelling (FDM) produces low-cost thermoplastic prototypes using materials including ABS, polycarbonate, and ULTEM. The critical decision point centres on material properties—if your design must validate heat dissipation performance, a plastic prototype provides false confidence; conversely, producing metal prototypes for exterior aesthetic validation wastes resources and schedule. Major additive manufacturing materials include metals, polymers, ceramics and composites, each offering distinct mechanical, thermal, and chemical properties that influence prototype functionality and durability.
Subtractive and casting technologies complement additive methods when you require production-representative materials or superior dimensional accuracy. CNC machining produces high-precision parts from virtually any machinable material with tolerances often within 0.05mm, essential when validating tight-tolerance interfaces, bearing surfaces, or critical dimensions. Vacuum casting uses silicone moulds and polyurethane resins to produce small batches of production-like parts rapidly, ideal for validating assembly sequences and ergonomic interfaces before injection moulding tool investment. Injection moulding prototypes demonstrate exact production material behaviour and surface finish quality. Sheet metal fabrication produces structural aerospace panels with authentic material performance. Die casting prototypes validate complex geometries under production conditions. The selection framework remains consistent: match your technology and material combination to the specific performance characteristics your design must validate. An automotive engineer validating structural performance under impact loads needs metallic prototypes through CNC machining or DMLS. An engineer validating assembly logic and ergonomic fit might employ vacuum-cast polyurethane or FDM thermoplastic at lower cost and faster schedule. Thermal validation demands metal prototypes; aesthetic validation demands surface finish authenticity. Cost efficiency emerges not from selecting the cheapest method universally, but from selecting the minimum technological and material investment necessary to answer your specific design question with sufficient confidence.
Here is an overview comparing key prototyping technologies by their industrial relevance:
| Technology | Primary Material Types | Industry Use Case | Speed vs. Accuracy |
|---|---|---|---|
| 3D Printing (SLS, SLA) | Plastics, metals | Rapid geometry evaluation | Fast, moderate accuracy |
| CNC Machining | Metals, plastics | Structural performance | Slower, high accuracy |
| Vacuum Casting | Polyurethane, silicones | Ergonomics, appearance | Moderate, good accuracy |
| Injection Moulding | Production-grade polymers | Pre-production validation | Slow, highest accuracy |
The practical reality is that most sophisticated aerospace and automotive programmes employ sequential prototyping strategies combining multiple technologies and materials. Initial exploration might use FDM thermoplastic for rapid iteration on form and fit, progress to SLS nylon for functional assembly testing, then employ CNC-machined aluminium for thermal validation and DMLS titanium for load-bearing structural testing. Each phase confirms specific performance aspects using the minimum material authenticity required for that question. This staged approach controls cost whilst managing risk systematically—you commit to expensive production materials only after less-costly prototypes have eliminated major design uncertainties.
Pro tip: Before selecting prototyping technology and material, write down precisely what physical or functional properties your design must validate, then select only the material authenticity and manufacturing precision necessary to answer that specific question.
Transforming your design concept into a functional prototype requires a structured approach that systematically validates assumptions and manages technical risk. The progression from design to prototype is not a linear path but rather a staged validation process where each step builds confidence in your design's viability. For aerospace and automotive engineers working under tight development schedules, following proven process steps prevents costly rework and accelerates time to market. Skipping stages or proceeding without clear validation criteria typically results in prototype iterations that answer the wrong questions, consuming budget and schedule without advancing your design maturity. The key to efficiency is understanding what each stage accomplishes and when you have gathered sufficient confidence to progress.
Before initiating any manufacturing activity, you must establish crystal-clear requirements that your prototype must satisfy. Defining requirements and objectives forms the foundation of the prototyping process, ensuring your prototype aligns with specific technical goals rather than vague aspirations. Document what your prototype must demonstrate: structural load capacity, thermal performance, dimensional accuracy, assembly feasibility, aesthetic finishes, material compatibility, or user ergonomics. An aerospace engineer might establish that a turbine mounting bracket prototype must validate structural stiffness under 5G acceleration loads. An automotive engineer might require prototype validation of dashboard panel assembly sequence and surface finish appearance. These requirements directly determine what technology, material, and fidelity level you need. Without explicit requirements, prototype development drifts toward unnecessary complexity and cost. Establish acceptance criteria before manufacturing begins so you can objectively assess whether your prototype successfully answers the questions driving development.
Modern product development begins with digital prototyping before committing physical resources to manufacturing. Digital prototyping leverages CAD and simulation to create detailed models enabling iterative testing and real-time feedback that reduces both time and cost. Detailed CAD models allow your team to perform finite element analysis simulating structural behaviour, thermal performance, and fluid dynamics. Digital assembly mockups reveal fit and interference issues before prototype manufacture. Stress concentration analysis identifies geometry refinements necessary before physical testing. Manufacturing simulation software predicts how your design will perform under actual production conditions, identifying manufacturability issues early when design changes are inexpensive. This digital stage compresses iteration cycles dramatically—you can evaluate dozens of design variations digitally in the time required to manufacture a single physical prototype. The critical insight is that integrating manufacturability considerations early in development prevents expensive design rework after prototypes reveal manufacturing constraints. Invest time in digital validation before fabrication begins.
Once digital analysis confirms your design viability, proceed to physical prototype fabrication selected based on your specific validation needs. Selecting suitable prototyping methods including CNC machining, 3D printing, and injection moulding depends on which performance characteristics require physical validation. Material selection must balance functionality requirements with manufacturing constraints and development schedule. Low-fidelity prototypes prioritise rapid fabrication to validate concept feasibility. Mid-fidelity prototypes introduce accuracy in critical functional areas. High-fidelity prototypes closely replicate production specifications when validating performance under realistic conditions. Manufacturing your first prototype typically reveals assumptions that digital analysis missed—material behaviour nuances, assembly difficulty, thermal characteristics in real environments, and surface finish requirements. Plan for iterative refinement. Test results from your first prototype inform design modifications for subsequent iterations. Most successful development programmes employ 3 to 5 prototype iterations, with each cycle compressing as you eliminate design uncertainty. The timeline from digital design to production-ready design typically requires 8 to 16 weeks when following this staged approach, substantially faster than ad-hoc prototyping. Document all test results and design changes meticulously so you build a complete development record supporting production confidence.
Pro tip: Before fabricating your first prototype, define explicitly what design uncertainties each prototype iteration must resolve, then stop fabricating once that uncertainty is eliminated rather than continuing to refine minor details.
Prototyping costs consume significant portions of your development budget, yet many engineering teams approach cost management reactively rather than strategically. Understanding what actually drives prototyping expenses allows you to control costs without sacrificing the technical validation your design requires. For aerospace and automotive engineers operating under compressed development schedules, cost overruns typically stem not from the prototyping itself but from poor process discipline and unrealistic expectations about what each prototype iteration must accomplish. The reality is that rapid prototyping methods often deliver superior cost efficiency compared to traditional manufacturing approaches, particularly when you are validating complex designs before expensive production tooling. Conversely, poor planning and unclear objectives can transform inexpensive prototyping into wasteful spending. The distinction between cost-effective prototyping and budget-draining prototyping lies in understanding which factors genuinely drive expenses and avoiding common pitfalls that inflate costs unnecessarily.
Cost factors in prototyping include design complexity, production method, logistics, and material usage, each influencing your total development investment. Design complexity determines geometric difficulty and whether your design requires precision tolerances or can tolerate looser accuracy. A simple enclosure with straight edges costs substantially less to prototype than an aerodynamic fuselage with internal cooling channels. Production method selection dramatically influences cost—3D printing excels at producing complex geometries rapidly at low cost, whilst CNC machining delivers superior accuracy at higher cost. For small quantities and complex parts, rapid prototyping methods offer lower total costs by saving on production and labour expenses compared to conventional machining. Material selection impacts cost significantly: titanium DMLS prototypes cost 8 to 12 times more than nylon SLS prototypes of identical geometry. Logistics costs escalate when you require expedited delivery to meet development schedules. Many engineers underestimate material waste and secondary finishing costs—3D-printed parts often require post-processing labour including support removal, surface finishing, and heat treatment. The practical approach is calculating total cost including all secondary operations, not merely the base manufacturing charge. Most aerospace and automotive programmes find that prototyping represents 15 to 25 percent of total development cost when managed well, but can exceed 40 percent when poor planning forces repeated iterations answering overlapping questions.
Prototyping timelines rarely follow initial estimates because most engineers underestimate design refinement cycles required for meaningful validation. A typical industrial prototype progresses through discovery phase (1 to 2 weeks), design phase (2 to 4 weeks), fabrication (1 to 3 weeks depending on method), testing and analysis (1 to 2 weeks), and design refinement (1 to 2 weeks) before proceeding to the next iteration. This represents 6 to 14 weeks per prototype cycle—many development programmes require 2 to 3 cycles, stretching total prototyping duration to 4 to 6 months. Accelerating individual prototype fabrication through expedited manufacturing services compresses schedules by 1 to 2 weeks but at cost premiums of 30 to 50 percent. The actual timeline acceleration often comes from parallel workstreams—whilst your first prototype fabricates, your team prepares test equipment and refines designs based on simulation results. Digital prototyping through CAD simulation and virtual testing compresses overall timelines substantially by eliminating entire physical prototype iterations for questions answerable digitally. Many teams discover that investing 2 to 3 weeks in sophisticated digital analysis saves 6 to 8 weeks in physical prototyping cycles. Honest schedule management requires building in contingency time for unexpected findings—nearly 80 percent of prototypes reveal design modifications necessary before proceeding to production.
Most cost and schedule overruns stem from preventable mistakes rather than inherent prototyping complexity. Prototyping without explicit validation objectives causes teams to fabricate parts that answer the wrong questions, then repeat iterations addressing actual design needs. Skipping digital analysis before physical prototype fabrication forces physical prototypes to discover issues that simulation could have identified at negligible cost. Specifying unnecessarily high fidelity—producing metal prototypes when plastic would reveal required information—wastes resources. Allowing scope creep by continuously adding validation objectives to each prototype iteration extends schedules without advancing toward production readiness. Underestimating secondary operations including finishing, assembly, and testing often doubles estimated prototype costs. Poor communication between design and manufacturing teams results in designs optimised for one method that prove difficult or expensive with the selected fabrication approach. Lack of clear acceptance criteria for each prototype iteration leads to subjective assessments about whether testing is complete, extending projects indefinitely. The most consistent cost and schedule problem across aerospace and automotive programmes is fabricating prototypes before design maturity permits meaningful physical validation—digital design must reach a specific level of confidence before committing manufacturing resources.
Pro tip: Establish target total prototyping cost and schedule before beginning development, allocate specific budgets to each prototype iteration with clear validation objectives, then stop fabricating once those objectives are met rather than permitting continuous refinement of minor details.
Navigating the complexities of industrial prototyping requires a partner who understands the critical balance between speed, precision, and value. The article highlights the importance of selecting the right prototyping fidelity and technology to address specific design questions effectively. If you face challenges such as managing costly iterations, meeting strict validation criteria, or integrating multiple prototyping methods, you are not alone. Achieving rapid design validation without sacrificing accuracy demands a streamlined process that controls costs and delivers meaningful insights at every stage.
At WJ Prototypes, we transform these challenges into advantages through our comprehensive suite of additive manufacturing and traditional fabrication services. Whether you need high-accuracy CNC machining for structural performance testing or rapid SLS and SLA prototyping to explore complex geometries, our ISO-certified facilities and expert engineers support your industrial design journey. Our solutions cover everything from vacuum casting and injection moulding to direct metal laser sintering, ensuring your prototypes match the exact fidelity level required to answer critical questions efficiently. Discover how to accelerate your development cycle and reduce risk by combining cutting-edge technologies tailored for aerospace, automotive, and precision engineering sectors. Start optimising your prototyping process today by visiting our website and explore our capabilities designed to meet your unique requirements. Need an instant quote or detailed project consultation? contact WJ Prototypes now and take the first step towards faster, more reliable product development.
Industrial prototyping is a structured process for creating early versions of a product to validate design concepts before full-scale manufacturing. It helps identify flaws and test assumptions, crucial for sectors like aerospace and automotive.
Fidelity levels define how closely a prototype resembles the final product. Low-fidelity prototypes are cost-effective and quick for concept exploration; mid-fidelity ones offer more detail for functional validation, while high-fidelity prototypes closely match production specifications for thorough testing.
Common prototyping methods include additive manufacturing (3D printing), CNC machining, vacuum casting, and injection moulding. Each method serves distinct purposes, such as rapid iteration, structural performance validation, and aesthetic evaluation.
Digital prototyping enables extensive simulations of structural behaviour, thermal performance, and assembly logic before physical fabrication. This approach reduces costs and time by allowing multiple design variations to be tested digitally, identifying issues early in the development cycle.
Benefits of Rapid Prototyping for Precision Manufacturing in China
Fast Prototyping Turnaround in China | Speed Up Product Development
Role of Prototyping in Product Development: Complete Guide
Rapid Prototyping Guide | 5 Important Steps To Prototype Design & Manufacturing
SERVICES
RESOURCES


