


- Room 1807, Unit 9, Building 2, Shangxing Commercial Street, Shangde Road, Shangxing Community, Xinqiao Subdistrict, Bao'an District, Shenzhen City, China
CONTACT US

WhatsApp

Aerospace & UAV
WJ Prototypes is your 3D manufacturing partner from prototype to large scale production.
Consumer Electronics
New Product Introduction Solutions for Consumer Electronics.

Robotics & Automation
Need some assistance bringing your robotic device or parts from the sketch-board to reality?
Medical Devices
The medical industry needs high quality, dependable and safe parts and products.
Automotive
New Product Introduction Solutions for Automotive
Industrial Machinery
The main purpose of industrial prototyping is to take the product from drawings into the real world.


TL;DR:
Proper understanding of industry standards ensures prototypes meet sector-specific quality requirements.
Effective preparation of tools, materials, and risk mitigation plans is critical to prevent defects.
Continuous monitoring and documentation enable ongoing improvement throughout the prototype lifecycle.
A single overlooked tolerance deviation once forced a medical device team to scrap three months of work and restart validation entirely. That kind of setback is not rare, and it is not just expensive. It can delay regulatory submissions, derail product launches, and damage client trust. Prototype quality means more than a part that looks right. It means a prototype that meets dimensional specs, material requirements, functional targets, and sector-specific compliance standards. In this guide, we walk you through how to set quality standards, prepare the right tools, execute a disciplined build process, and build a monitoring loop that compounds improvement over every iteration.
| Point | Details |
|---|---|
| Know your standards | Industry-specific regulations guide what prototype quality means for your project. |
| Use FMEAs early | Identifying risks at the design or process stage stops failures before they start. |
| Validate in stages | Follow structured, phased validation for reliable results and compliance. |
| Document and improve | Continuous monitoring and learning produce outstanding prototypes each cycle. |
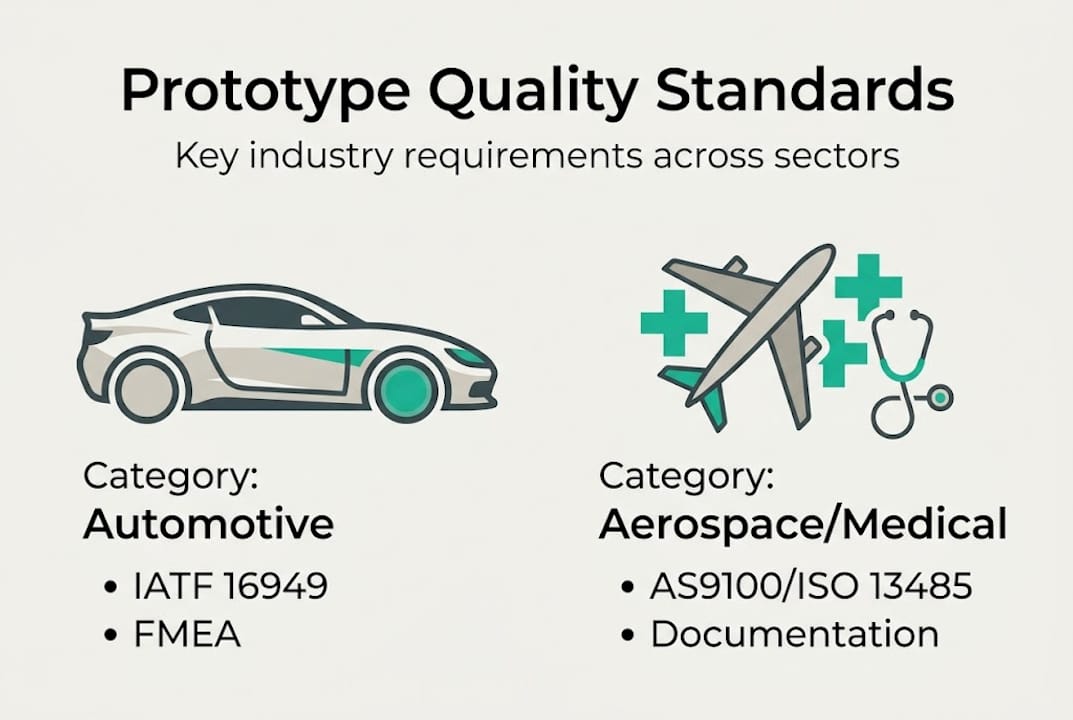
With high stakes in project outcomes, start by clarifying what quality means for your project. The definition is never universal. A robotics prototype that needs to pass dynamic load testing has completely different quality criteria than an automotive bracket that must survive vibration and thermal cycling. The first step is always sector-specific standard identification.
Different industries enforce different certification frameworks. Automotive development operates under IATF 16949, which requires statistical process control and supplier qualification. Medical device prototyping falls under ISO 13485, which demands design history files and risk management records. Aerospace prototyping follows AS9100, which requires first article inspection and configuration management. Robotics increasingly references ISO 10218 for safety. Knowing which standard governs your project is not optional. It defines every downstream decision.
IATF 16949, ISO 13485, and AS9100 all mandate Failure Mode and Effects Analysis (FMEA) as a core quality tool, meaning that risk documentation is a regulatory obligation, not a best practice suggestion.
Standards comparison across sectors
| Sector | Primary standard | Key requirement |
|---|---|---|
| Automotive | IATF 16949 | FMEA, SPC, supplier control |
| Medical | ISO 13485 | Design history file, risk management |
| Aerospace | AS9100 | First article inspection, config control |
| Robotics | ISO 10218 | Safety validation, hazard analysis |
Once you know your governing standard, translate it into actionable prototype specifications. That means turning abstract requirements into measurable targets your team and your supplier can verify.
How to translate standards into prototype specs:
Good prototyping best practices reinforce that documentation started at kickoff is always cleaner than documentation reconstructed after the build. When choosing prototyping services, confirm that the supplier has experience with your governing standard and can provide the inspection records your compliance team needs.
Pro Tip: Open a quality plan document on day one of the project. Even a simple spreadsheet tracking requirements, acceptance criteria, and responsible owners prevents the documentation gaps that cost weeks during final review.
Once standards are clear, effective preparation ensures you avoid missteps and proactively address risk. Choosing the wrong material or process at this stage creates defects that no amount of downstream inspection can fix. Preparation is where quality is either built in or designed out.
Different prototype types demand different tool and material combinations. A structural aerospace component requires tight-tolerance CNC machining and certified aluminum or titanium stock. A functional medical housing may call for biocompatible SLA or MJF nylon. An automotive seal prototype needs material that mirrors production-grade rubber behavior. Matching process to requirement is the foundation of a clean build.
Tools and materials by prototype type
| Prototype type | Recommended process | Material example |
|---|---|---|
| Structural aerospace part | CNC machining | 7075-T6 aluminum, titanium |
| Medical enclosure | SLA or MJF | Biocompatible resin, PA12 |
| Automotive functional part | CNC or vacuum casting | ABS, polyurethane |
| Robotics actuator component | DMLS or CNC | 316L stainless, tool steel |
Beyond tooling and materials, risk mitigation planning is the critical preparation step most teams skip or delay. FMEA is the industry-standard method. There are three types you need to know:
FMEA systematically identifies failure modes, scores them by severity, occurrence likelihood, and detection difficulty using a Risk Priority Number (RPN) or the newer Action Priority (AP) method, then drives mitigation for the highest-risk items. AP is increasingly preferred in medical and automotive contexts because it forces action on high-severity items regardless of their overall RPN score.
For deeper guidance on executing the build itself, the prototyping step-by-step guide and precision prototyping engineering resources are excellent references for matching process capability to spec requirements.
Pro Tip: Schedule a dedicated risk review meeting before the design is finalized. Catching a wall thickness issue in DFMEA costs minutes to fix. Catching it after the first build costs days and budget.
With the right setup, quality hinges on disciplined process and validation. Two terms that developers often use interchangeably actually mean different things and treating them as the same is a consistent source of failure.
Verification asks: does the prototype meet its specified requirements? It is a comparison against documented specs, tolerances, and acceptance criteria. Validation asks: does the prototype actually work for its intended real-world use? It involves end-user testing, contextual performance evaluation, and safety assessment. You need both, in sequence.
Here is a phased build and validation process that works across aerospace, automotive, medical, and robotics projects:
For robotics prototypes specifically, phased validation follows ISO 10218 and ISO 9283, covering component, integration, system functional, and safety stages. Each phase must be documented and signed off before advancing.
Cross-functional review at each phase is not overhead. It is your early warning system. Engineers catch dimensional issues, regulatory teams catch compliance gaps, and end users catch usability problems that no spec sheet ever predicted. Skipping these reviews to save time is exactly how projects lose months, not days.
For teams running additive manufacturing builds, the additive prototyping workflow and rapid prototyping best practices provide step-specific guidance for maintaining quality through SLA, SLS, and DMLS processes.
Pro Tip: Never skip the user feedback round, even for a functional prototype that passes all specs. Specs describe a system in isolation. Users reveal how it behaves in reality.
After building and testing, maintaining quality depends on robust documentation and iteration. The prototype lifecycle does not end at validation. In regulated industries, post-build monitoring and continuous improvement are formal obligations, not optional enhancements.
Steps for effective monitoring and documentation:
Post-deployment monitoring is a formal part of phased validation in robotics and other high-stakes sectors. Continuous improvement is not a philosophy. It is a required outcome of any responsible quality program.
Quality improvement techniques after the first prototype:
Transparent records are your best defense during regulatory audits. Inspectors do not expect perfection. They expect evidence that your team identified issues, investigated causes, and implemented controls. A clear, traceable quality record demonstrates exactly that. For precision-critical components, metal prototyping accuracy tips provide practical guidance on maintaining dimensional consistency across iterations.
Stepping back, it is worth considering how these methods differ from what most teams actually do. In our experience working with developers across aerospace, medical, and robotics sectors, the most common failure is not a lack of checklists. Teams have checklists. The failure is treating checklists as a substitute for judgment and cross-functional engagement.
RPN scores in FMEA are overused as a decision filter. A failure mode with a low RPN but a maximum severity rating should stop your build. Severity always outranks the combined score. Teams that anchor on total RPN and deprioritize high-severity, low-occurrence risks are setting up for the kind of field failure that defines a product's reputation permanently.
The other misunderstanding is timing. Early collaborative reviews, where design, manufacturing, regulatory, and end-user representatives are all in the same conversation before the build starts, consistently produce fewer rework cycles. Insights from precision part fabrication reinforce that teams who document lessons from every build cycle outpace competitors in speed to market. The investment in early rigor pays back with compound interest.
If you're ready to take your prototyping to the next level, start here. At WJ Prototypes, we work with product developers and project managers in aerospace, automotive, medical, and robotics who need prototypes that clear compliance reviews and survive real-world testing. Our engineering team supports your build with material expertise, in-process inspection, and documented quality records. Explore our full range of CNC machining materials to match your spec requirements precisely, or review our CNC machining services for tight-tolerance components. Request a quote today and get direct access to engineers who understand your sector's quality demands.
Explore competitive Rapid Prototyping Services with expert support from WJ Prototypes.
Whether you're comparing suppliers or looking to optimize costs, our team can help you evaluate the best option for your project.
👉 Request A Quote now or email us at info@wjprototypes.com to get started.
Identify all relevant industry standards for your sector and clarify project specs to set measurable quality goals before any fabrication begins. IATF 16949, ISO 13485, and AS9100 all require FMEA as a baseline quality tool.
FMEAs systematically uncover risks, prioritize corrective actions, and satisfy regulatory requirements in automotive, medical, and aerospace development. They turn vague risk awareness into actionable, documented controls.
Verification checks if the prototype meets its documented specs, while validation confirms it performs correctly in real-world use conditions. Phased validation frameworks like those in robotics treat these as separate, sequential gates.
Consistent monitoring of defect rates, thorough root-cause documentation, and continuous improvement practices applied after each build cycle drive measurable gains across iterations.
How to Prototype Parts | Step-by-Step Guide for Professionals
7 Best Practices for Product Prototyping Success
A Comprehensive Guide To Prototyping in Product Design
7 Essential Rapid Prototyping Best Practices for Teams
Solving Product Development Challenges
Design vs Print: Why Stunning Files Fail in Production
Explore competitive Rapid Prototyping Services with expert support from WJ Prototypes.
Whether you're comparing suppliers or looking to optimize costs, our team can help you evaluate the best option for your project.
👉 Request A Quote now or email us at info@wjprototypes.com to get started.
SERVICES
RESOURCES


